NOTE: If you want to see an enlarged picture – Right click the picture and open it in a new tab. It will open in a new tab almost full screen sized.
I am not sponsored by anyone, so my evaluations of the gear in this section is my opinion of what has worked for me. I am constantly looking at new things in stores, online, or what other people I meet outside have/recommend. I will try to group things by how they are used.
Below I am sharing my gear list spreadsheet I created and use regularly. It gives me a good picture of what I am carrying, reminds me not to forget something and gives me an idea of the weight I am carrying. You are welcome to download and use it for yourself.
The table of contents below is clickable so you don’t have to scroll to get to see what you want.
- Safety First
- Shelter
- Sleeping
- Food Preparation
- Keeping gear dry:
- Water:
- Electronics
- Hygiene:
- Creature comforts
- Cloths
Safety First
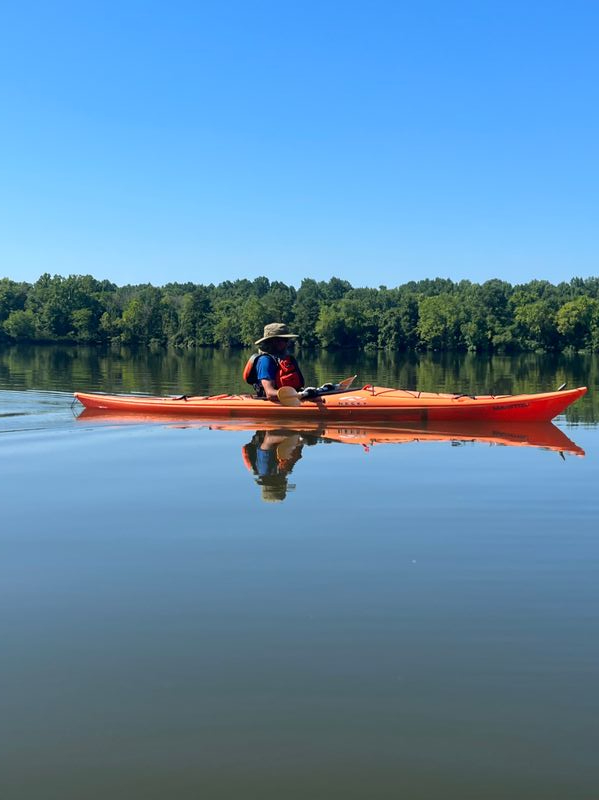
Safety is of utmost importance when traveling alone, or into secluded areas. Here are the items I use to assure my safety while paddling.
PLD – Personal Locator Device
Theses devices are a great insurance policy while paddling, hiking or biking. I use the Spot, my buddy uses the Garmin In Reach . Either device has it’s benefits; the spot device can have 2 way communication, I opted not to; the In Reach has 2 way communication as a standard. The Spot is smaller and I have had one for years (prior to two way communication), having to upgrade this year after the original device had a bad fall. Two way communication requires your cell phone no matter the PLD device. These devices use satellite communication and thus do NOT require cell service.
Either of these devices can be found in most sporting goods stores and on Amazon. Both require a fee; the spot is an annual fee and the In Reach has different plans where you can turn the service on and off as you use it.
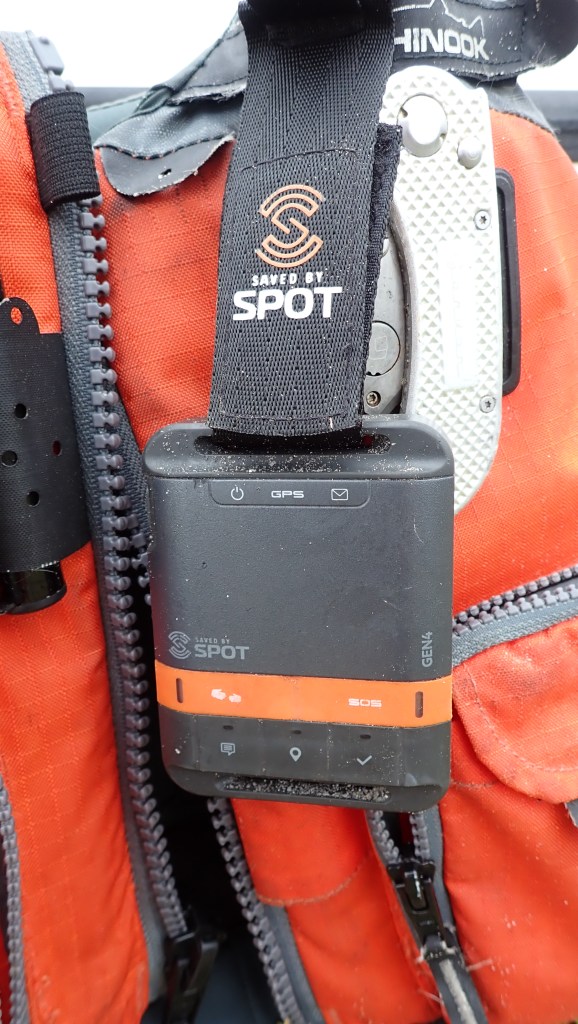
I only use this device when paddling, so I turn it off after sending my check-in message daily. So lets go over the Spot pictured above:
Up top there is an on/off switch and a message alert display (notifying you it is sending).
The orange band has two buttons:
NEEDS ASSISTANCE button: would be used when NOT in a life threating situation. It will send a canned message (created by you) that you require assistance to people you have assigned to receive it. Those who have received it can then reach out to the proper authorities to get you assistance. They can share your map and thus the authorities will be able to locate you.
SOS button: is for life threating situations. If you need to press this button the Calvary is sent and will be able to locate you and be there quickly almost anywhere in the world. Press this and it isn’t life threating and the cost is on you. The cost is heavy too, so use it with caution.
The bottom set of buttons:
Custom Message: This button allows you to send a canned message you create to those you specify. I use it to mark where something notable is or happened.
Track button: You can set the tracking interval from every 5 minutes to every hour. I set mine to every 10 minutes.
Check-in Button: My check-in message reads: All’s well – Either good morning, I am off the water or Good night. One of those will work. – so as you can see I wake send a message, travel for the day send the same message when safe at camp and then once again at bed time.
PFD – Personal Flotation Device
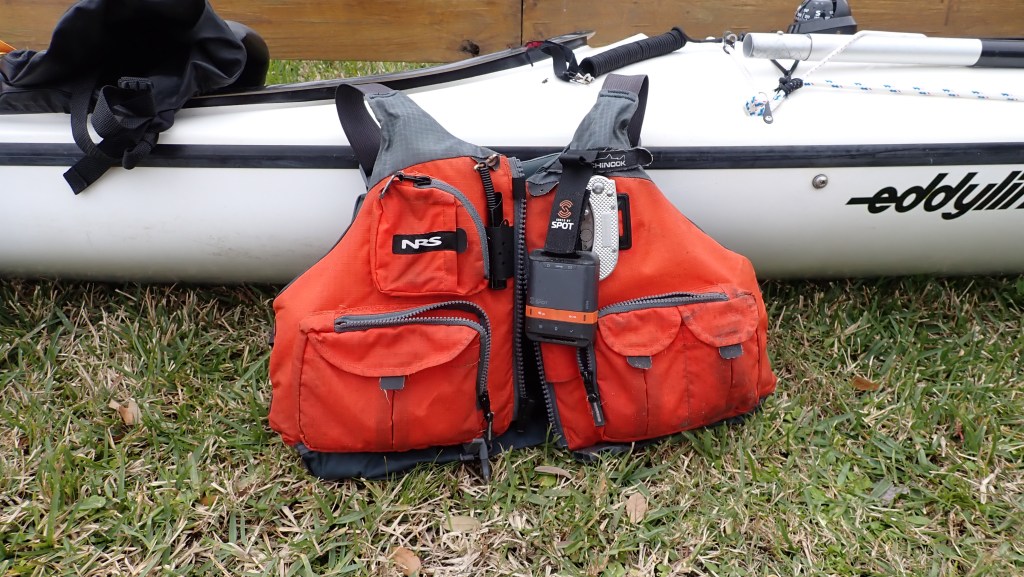
These are a MUST when paddling. In many places they are required by law. You should wear your PFD whenever you are on the water, you have no idea when you will be flipped or need the PFD until it is too late. These are also a very personal decision, for comfort and use. I like the NRS Chinook because it is comfortable for me and has pockets for some gear when traveling. Gear can be phone (in it’s water proof pouch), fishing gear, snacks or whatever.
Extra Paddle
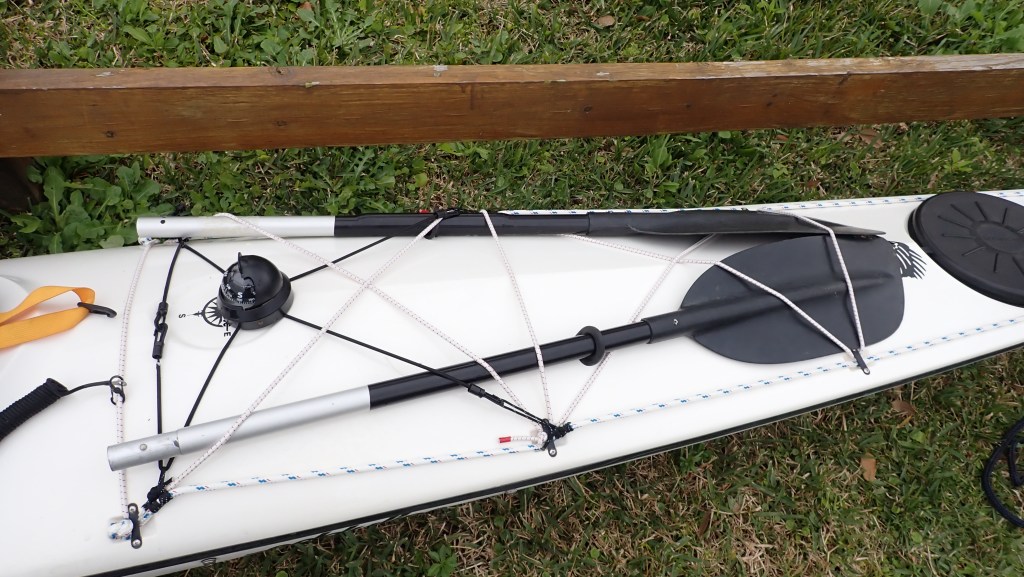
I don’t carry this normally but on the ICW if my main paddle is broken or separated from me I have this on the front of the Kayak within reach.
Paddle Leash
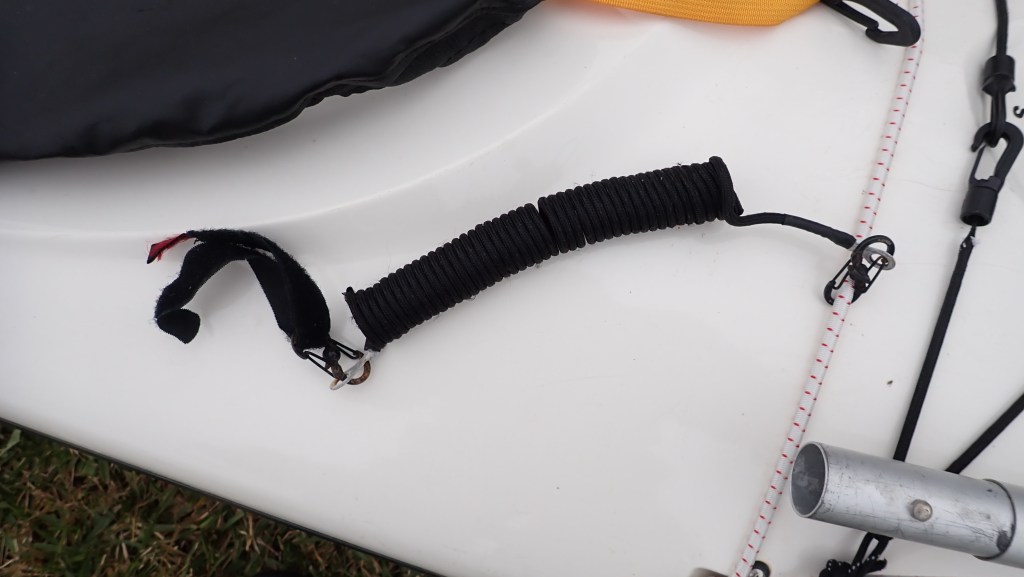
This leash attaches to my kayak and then to the paddle in use. If I drop the paddle I can quickly retrieve it and continue paddling. I DIYed this leash from some string trimmer string, a Velcro strip, two clips and parachute cord. Google the how to for that it is quite easy.
Compass
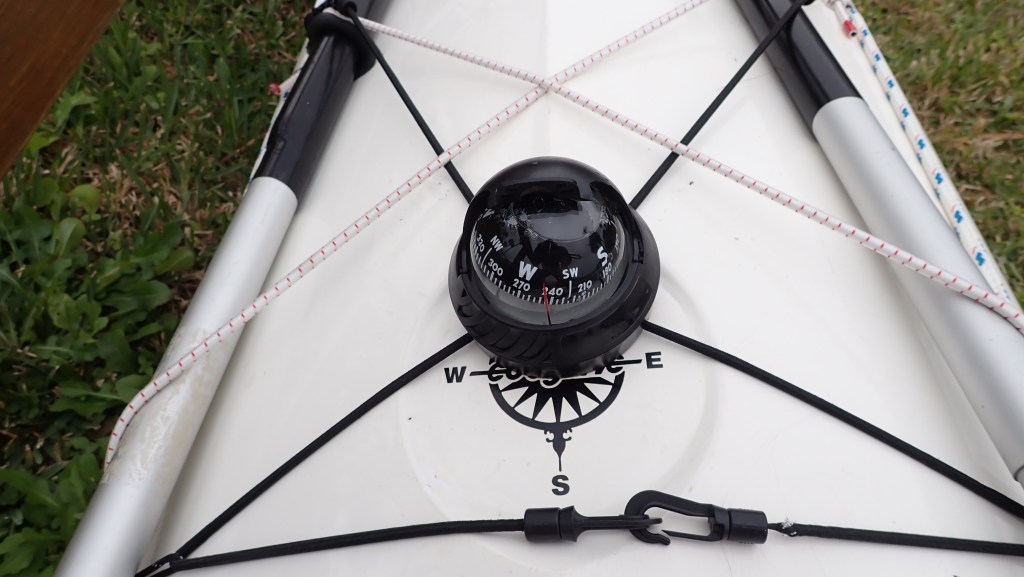
I carry a hand held compass in my ditch kit, but I like being able to just look forward to see my general direction. I was thinking of doing some ocean paddling on the ICW trip to bypass the Georgia swamps, and the compass would be a great safety addition if I do that.
Ditch Kit
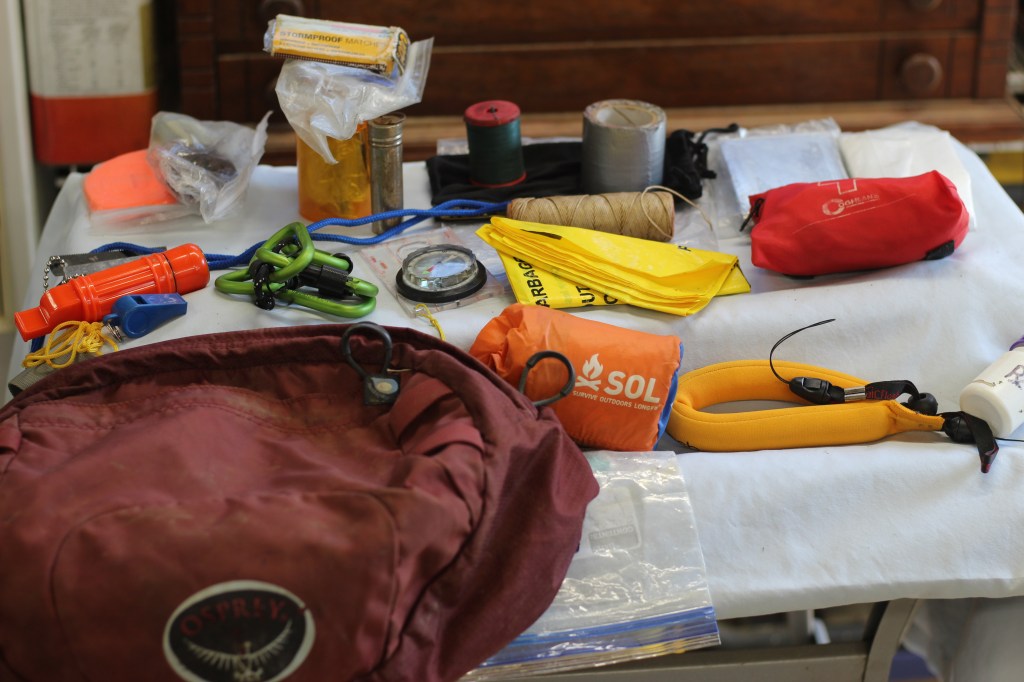
The ditch kit as it implies carries items that would be of assistance for survival in a bad ditching. I put these items into the top of my Osprey pack which I can use like a fanny pack. I can strap it to my leg so it will be with me if I ditch. I do allot of my trekking in colder climates and tend to be out on shoulder seasons when the water and air temps are colder; therefore this kit is more important there. On the ICW for the most part I should be able to get assistance quickly since it is fairly populated.
The kit carry’s some basic first aide items, compass, whistle, duct tape, heavy duty thread, mirror (for signaling), Magnesium fire starter, matches in water proof containers, space blanket and a Bivy (emergency shelter). I usually add my PocketBoy saw in the kit just as a space saver and to know where it is. I hope I never need to use it as intended, just the parts as I trek.
Dry Suite
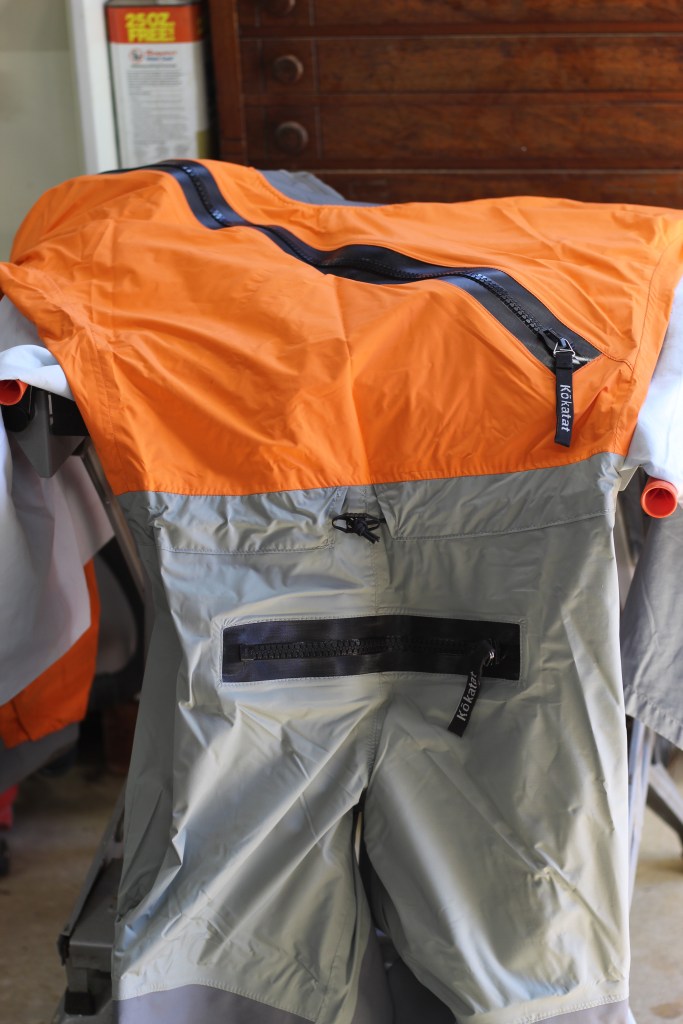
I tend to paddle in colder temps so this dry suite is for safety. Once water and air temps are 50 or below I tend to put this on. If I do end up in the water, the suite will give me an advantage at self rescue, giving me precious minutes to get out and to safety. I know some of you will say they are too hot; yes I know it is basically a tailored plastic bag that traps body heat and moisture. But I would much rather have that discomfort than the alternative possibility of hypothermia fogging my decisions.
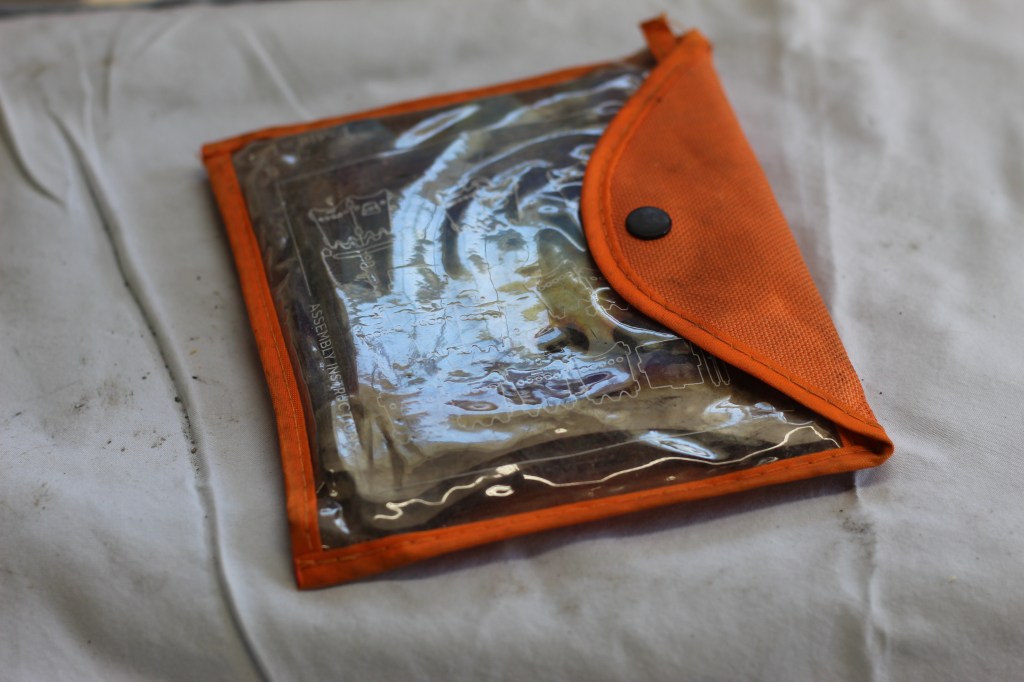
Boat safety kit
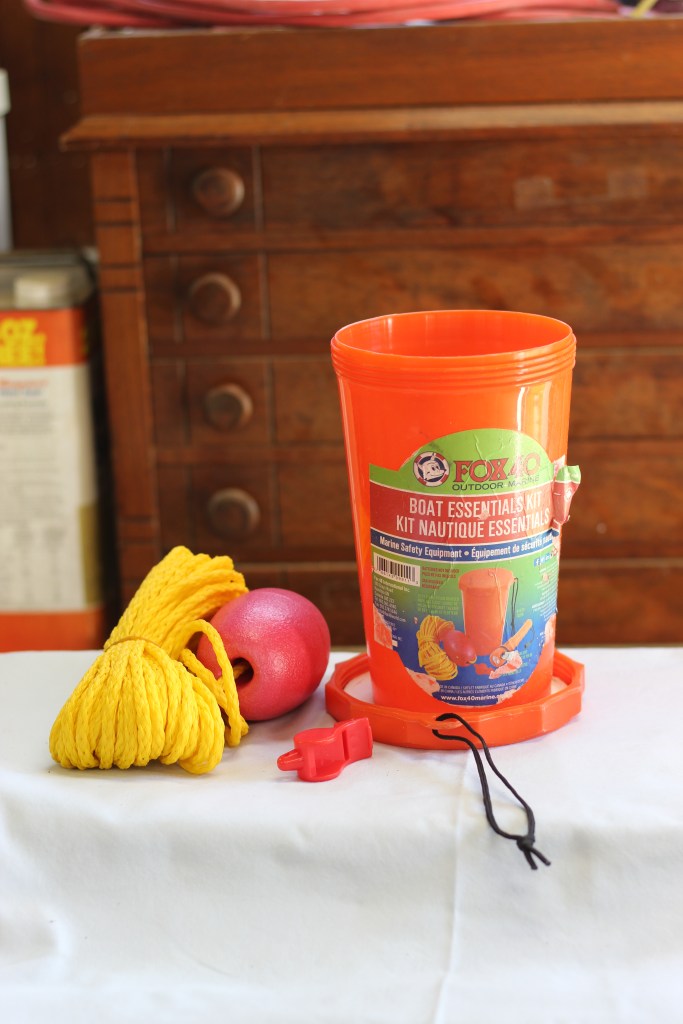
In Canada this is a must, required by law. I don’t have it with me on the ICW but is always in the canoe when paddling in Canada. As you can see there is a whistle, a throw rope and the container acts as a bailer.
Shelter
Hammock:
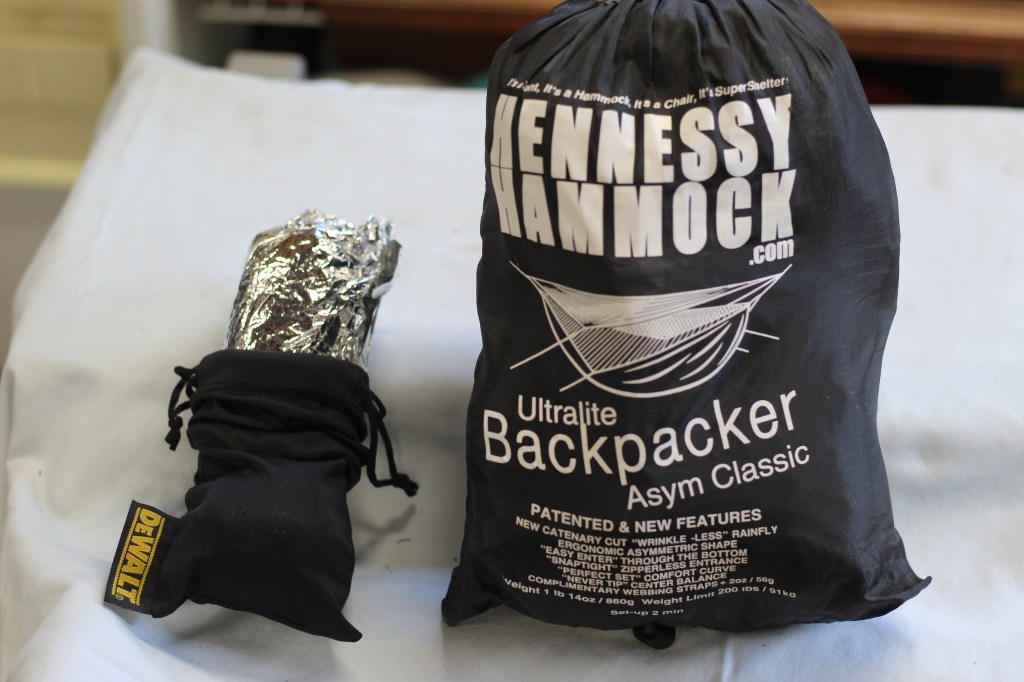
At 67 yrs old I prefer not to get down on the ground so a proper tent is not here. I use a hammock, which keeps me off the ground which presents its own issues. For instance as the temps drop you will need an under-quilt to keep the cool breeze from sapping your body heat. With a tent you normally try to find a level cleared spot to setup, which can prove to be problematic. With a hammock all you will need is two trees about 20 to 40 ft apart (20 is most desired – less sag and sway). I find I can setup in even the worst tent sites I have visited (wet, rocky, uneven or unlevel). I have even setup on a steep slope and slept level, flat and comfortable. I use a asymmetrically cut hammock from the Hennessy Hammock company.
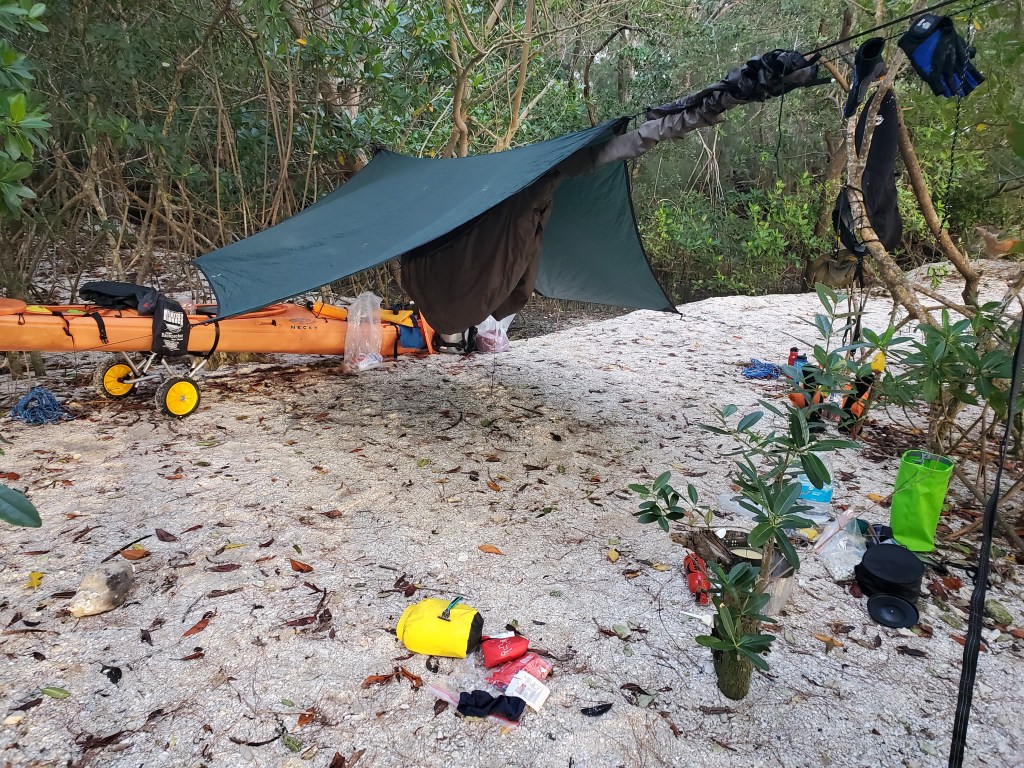
The hammock set as purchased, includes a tarp and an incorporated bug netting. I purchased a larger tarp for better coverage (seen above). I use the original tarp as a dining or gear fly separately.
You enter the hammock through the bottom (however they have a side entry option if you would prefer that). When you get into the hammock your weight closes the bottom opening and the velcro keeps it closed as you move about. I feel that entering via the bottom confuses the bugs enough that you don’t get many sneaking in with you.
The asymmetrical cut is what allows me to sleep flat (yes flat, in a hammock) because you lay at an approximate 30 degree angle to the ridge line. You can sleep on your back or your side (almost on your stomach, but not quite) and you will be flat.
The hammock again, as purchased is a single bottomed hammock. Since I tend to go on the shoulder seasons (when temps dipped to the 20s) I needed an under-quilt. This under-quilt adds thermal protection from the wind that is blowing under you as you sleep. I can (and have) slept in temps as low as the upper teens (Fahrenheit) comfortably with this system. The silver, mylar, sheet in the first picture above is part of the under-quilt system. The under-quilt includes a heat reflective sheet and light foam pad in a separate layer just under the hammock bottom.
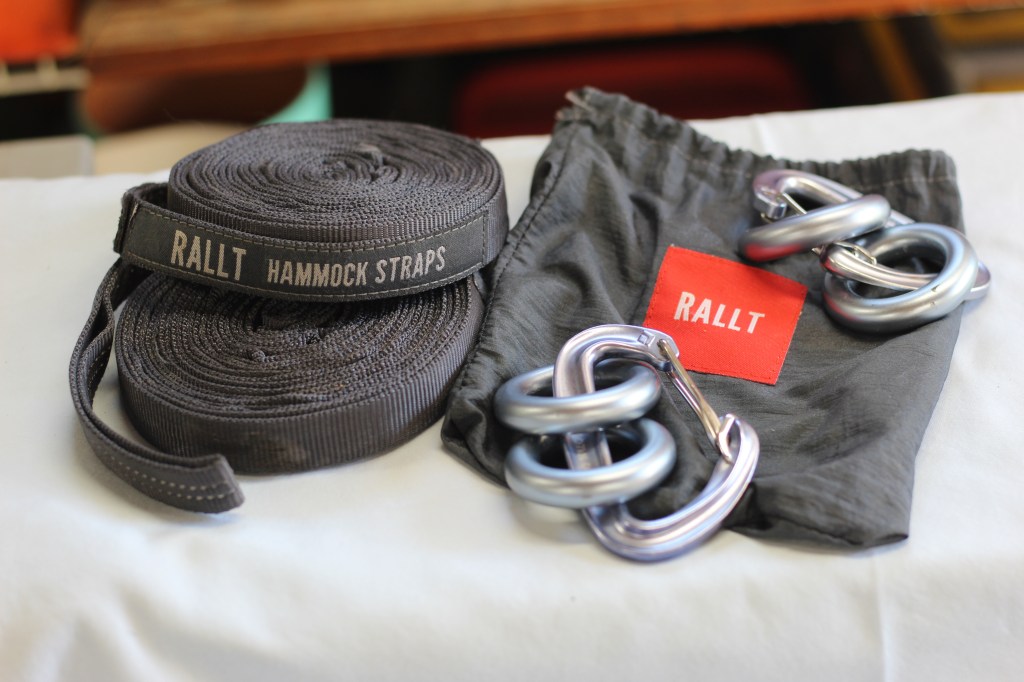
To hang my hammock I use a system of tree straps, carabines, and rap (rappelling) rings; rather than knots. Knots tend to bind throughout the nights sleep and are difficult to break down at the end of my stay. So the rings and biners are used to pinch the hammock lines, but allow you to release it after a nights sleep. Again YouTube is your friend here and can explain how to use these. There are other suspension systems; whoopie hooks, buckles and more for you to experiment with. I am currently experimenting with cam’s, and with limited experience thus far I am thinking of moving to them. Update: The cams are not friendly to the outer covering of the parachute cord, when the outer layer separates you drop to the ground. I don’t recommend cams.
The setup includes a bug net system, but you are sleeping right up against the hammock. (You don’t sleep that close to your tent walls.) The hammock is made of high thread count nylon taffeta, well the bugs can bite through the hammock. You will need to be aware of that and try to keep your bag between you and the hammock. The under-quilt system does add a second layer under you, which will also assist at keeping biting bugs off you. I have NOT had any problems, but I am conscious to keep my skin from touching the hammock.
I will be honest and say I have not tried any other hammock systems, however I am very pleased with Hennessy Hammocks. There are other brands, styles … and loads of reviews on YouTube if you are interested. For me this has and continues to be my go to.
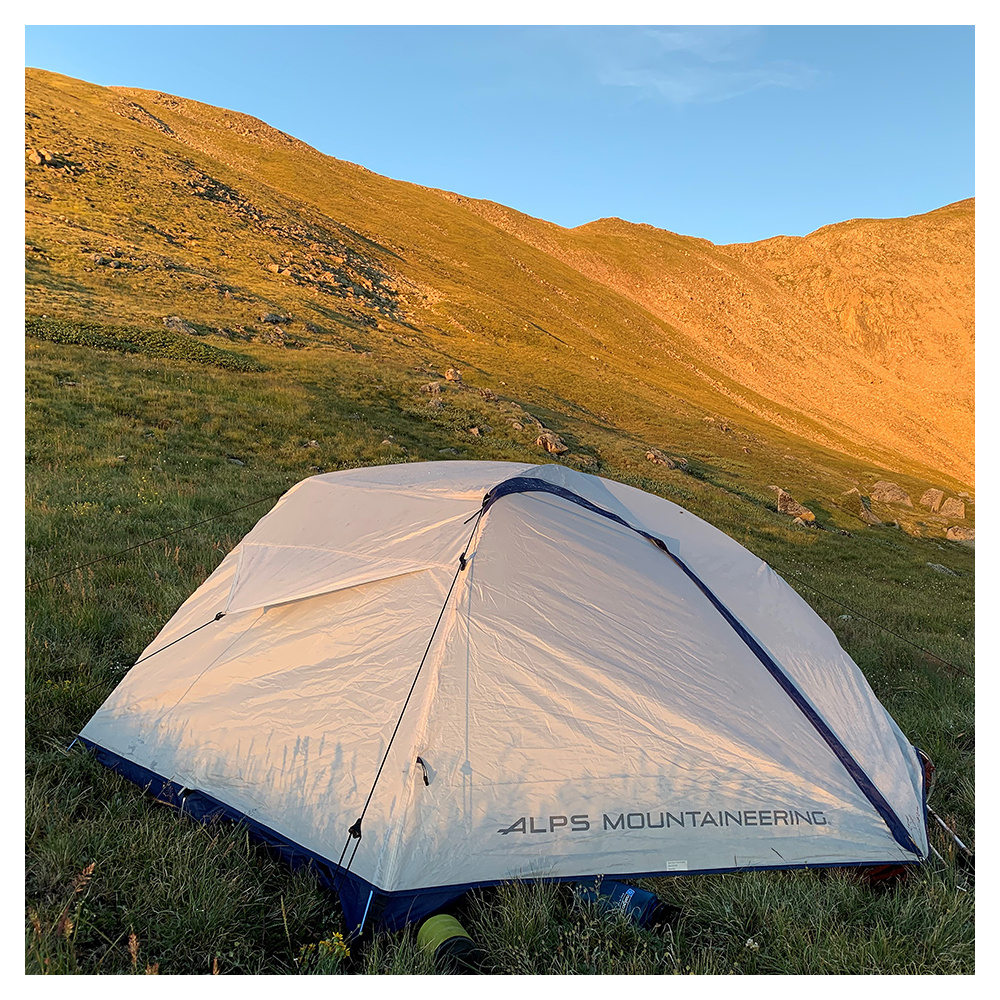
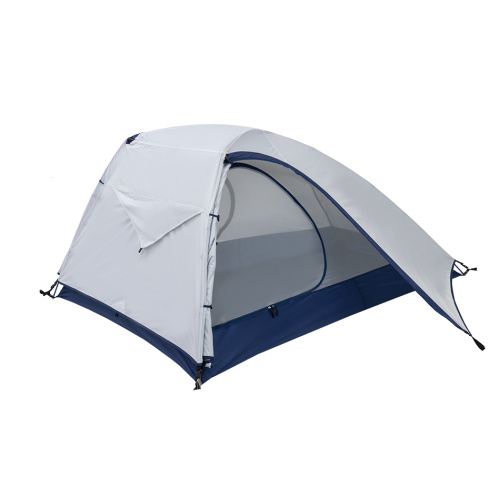
Tent:
I normally do not like tents, however they have their place. On the ICW trip I knew from the first go-round that I would need a tent. So I borrowed my daughters backpackers tent, a Zephyer 2 tent. It was a good decision as most of the Florida parks (state and county) do NOT allow you to hang anything (not even close lines) from trees and poles. Some parks do provide hammock sites, with poles specifically for that purpose.
The tent was my lifeline when I forgot my tarps on the ICW 2024 trip. The tent provided shelter even though I couldn’t use my hammock. It did add 5lbs 11oz’s to the total weight but I would have been up the creek so to speak without it.
Sleeping
Cat’s Meow
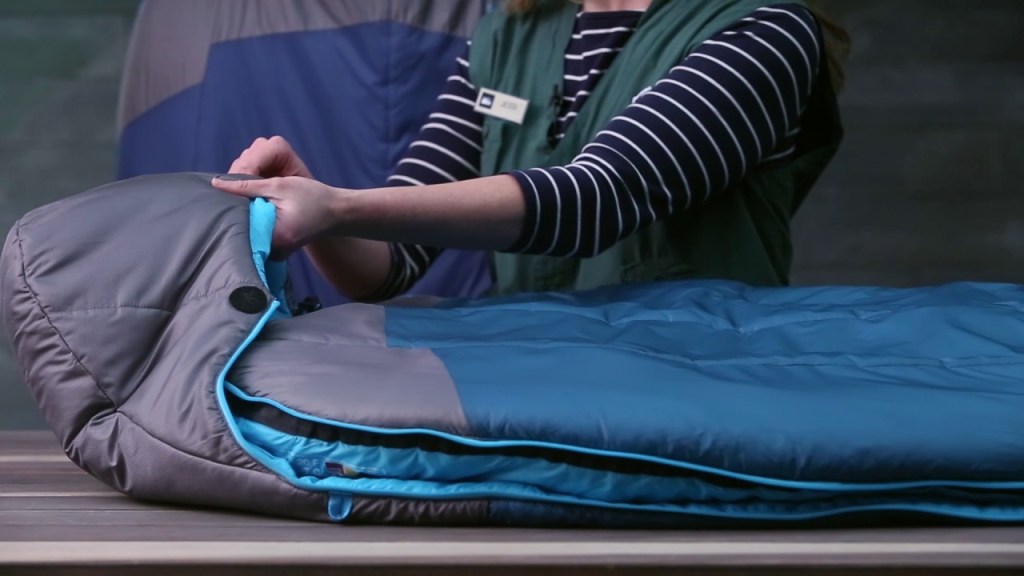
I use the NorthFace Cat’s Meow sleeping bag as my main bag. It is rated to 20 degrees so it is overkill for the summer months. I am adding the stock photo from the REI website here. I use a sheet as a liner, folded lengthwise which I have sewn an end and 1/3 of the length.
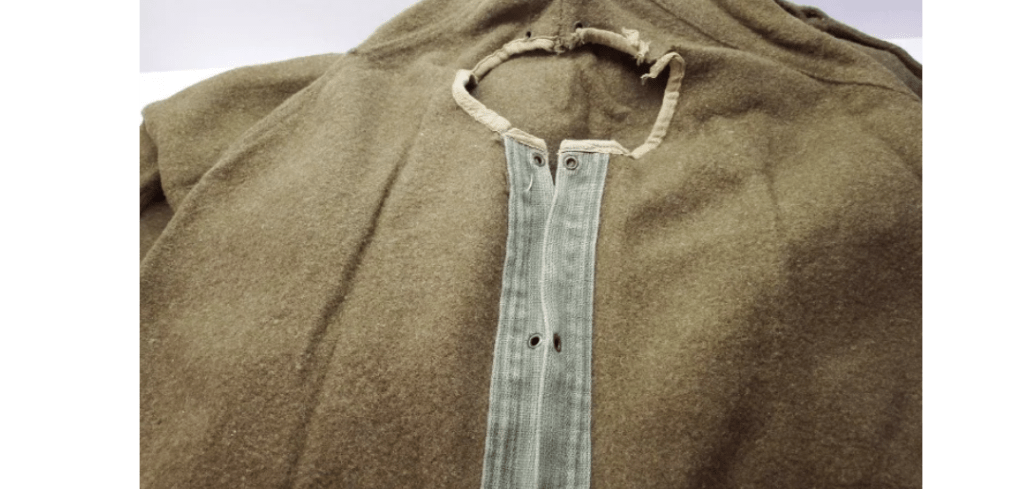
Wool Mummy bag
I have many old wool army mummy bags. I seldom use them but they are better than the cat’s meow in the summer. Otherwise I just grab a blanket or two in the summer.
Food Preparation
Many of my trips require me to portage (carry – bust my butt …) my gear. So I have tried to get ultralight cooking gear. I do have some not so light cooking gear when I know the amount of portaging will be minimal. Here are my choices:
Stoves
Stoves are a necessary evil when there are fire bans, and are an asset even when there isn’t a fire ban. I use a stove on almost every trip; here are the stoves I have used/recommend:
MSR WhisperLite
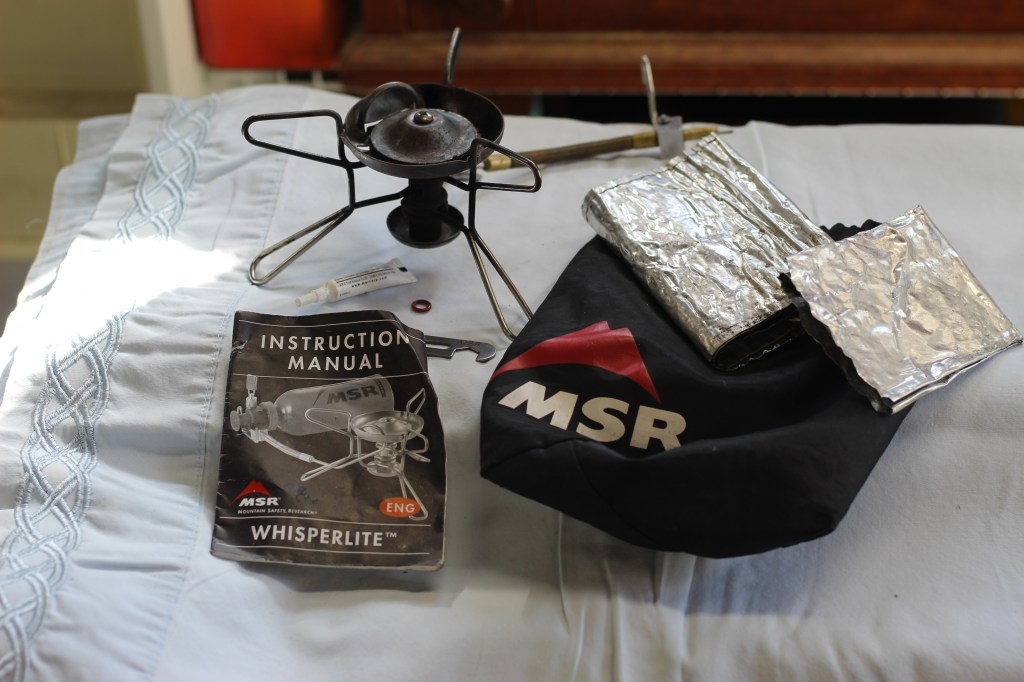
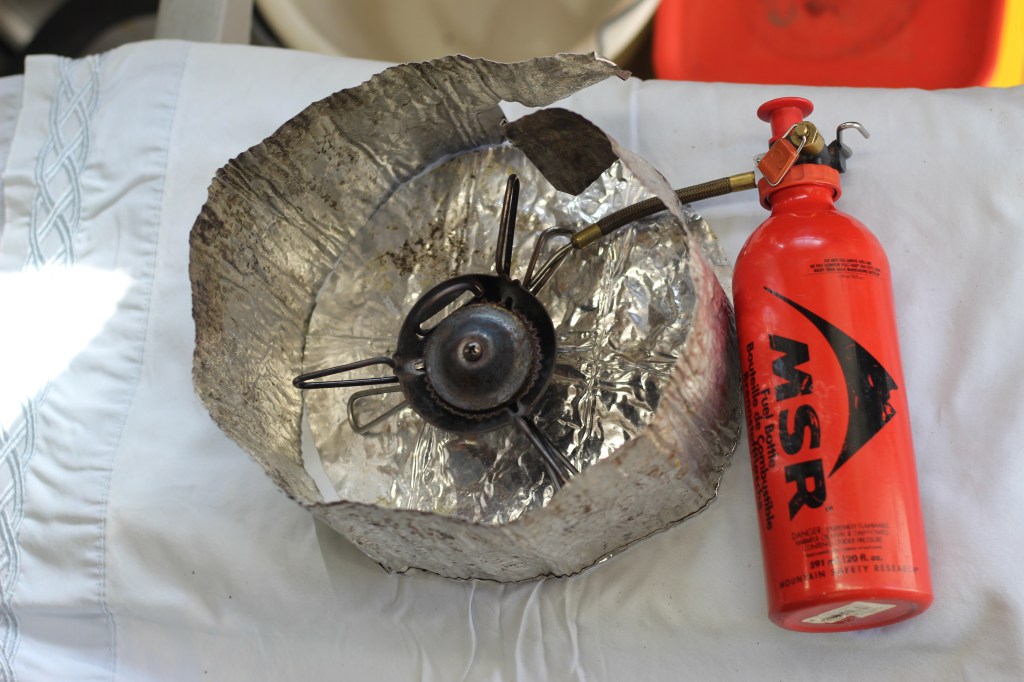
This MSR WhisperLite has been with me for years, and has been pretty much bullet proof. After about 15 years of reliable service I finally broke down and got a service kit for it and changed the gaskets, otherwise this has been rock solid. I use it even when there aren’t any fire bans. I like the fact that this uses a liquid fuel, I don’t like the canister style stoves. The canister stoves aren’t always refillable and thus I have found too many of them in privies and other places they don’t belong. I carry a second tank on long trips but have never had a leakage nor have I run out of fuel.
The WhisperLite’s flame isn’t as adjustable as some of the canister styles so I have improvised and gotten a small grille I can place my pot on over the stove. This gives the pot more stability as well as giving me options. The grille has 2 heights, one is as if the grille didn’t exist the other places it slightly higher off the heat.
Twig Stove
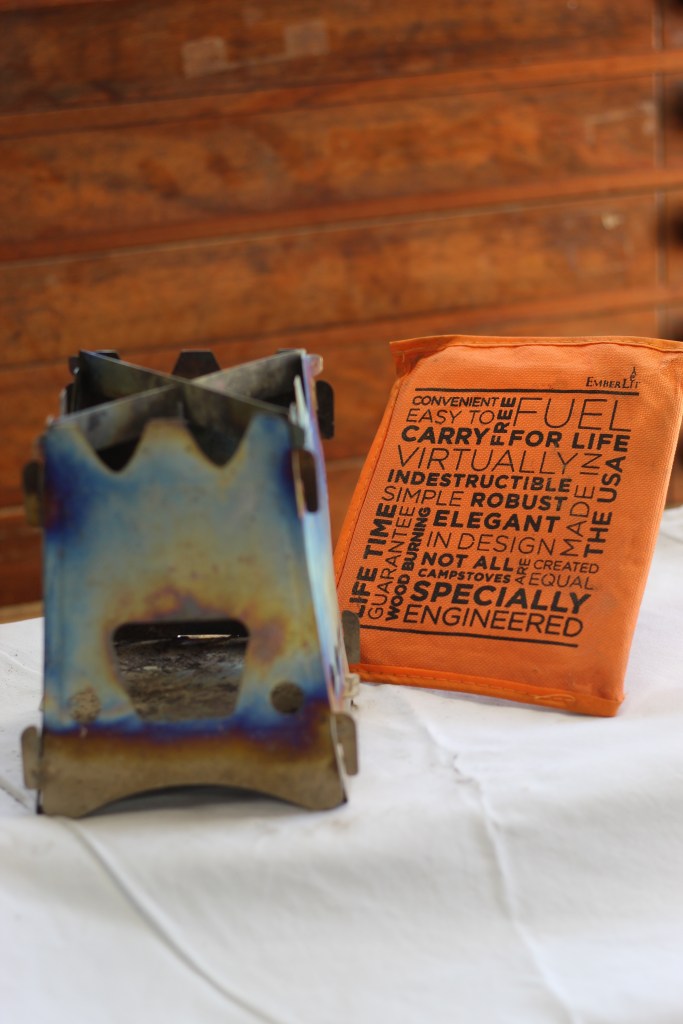
I use this stove mainly to bake on (see makeshift oven later) or for boiling water as a second stove source. It folds to a thin, light weight (titanium) package, and uses (as named) twigs for fuel. It does NOT qualify to be used during a fire ban.
Alcohol Stove
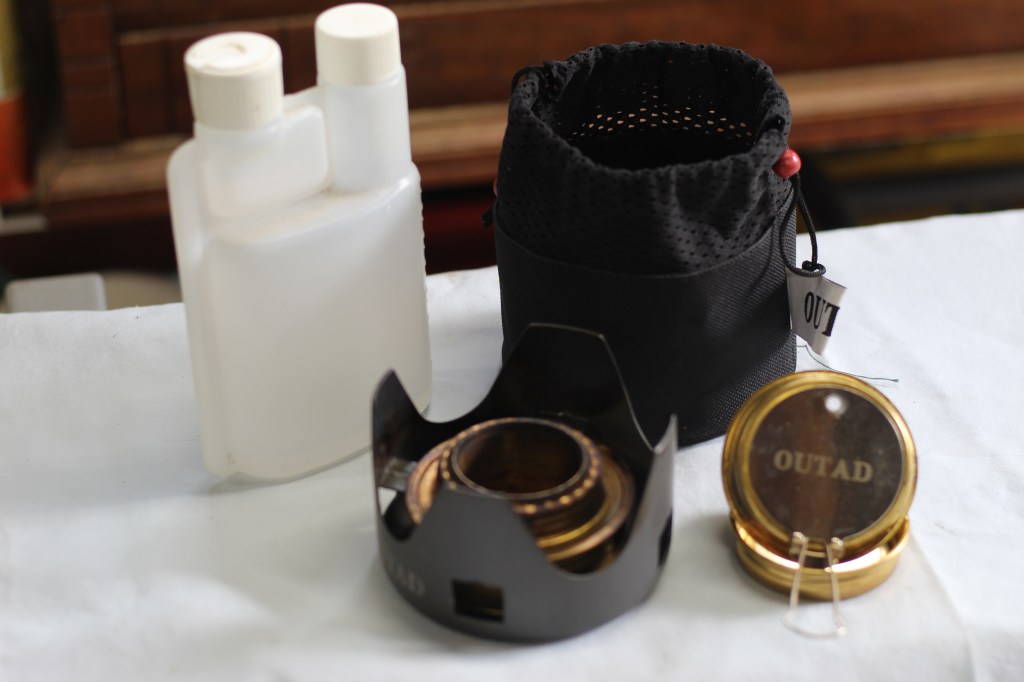
This is another liquid fuel stove I may carry on a trip. It is not as efficient as I had hoped when I purchased it. It will, however boil water for me fairly quickly. I haven’t tried cooking on it other than the water so I can’t say how well that would work. A 2 oz fueling boils the water (barely) and burns out. Then you should wait to refuel and try again. I carry it very seldom and only as a backup stove or to boil water while cooking on the Whisper Lite. I believe it does qualify to be used during a fire ban.
Pots n Pans
I try to pack light so I have an assortment of pots and pans to choose from – What I bring depends mainly on weather I am solo or not. Here are my current options:
Anodized Aluminum set
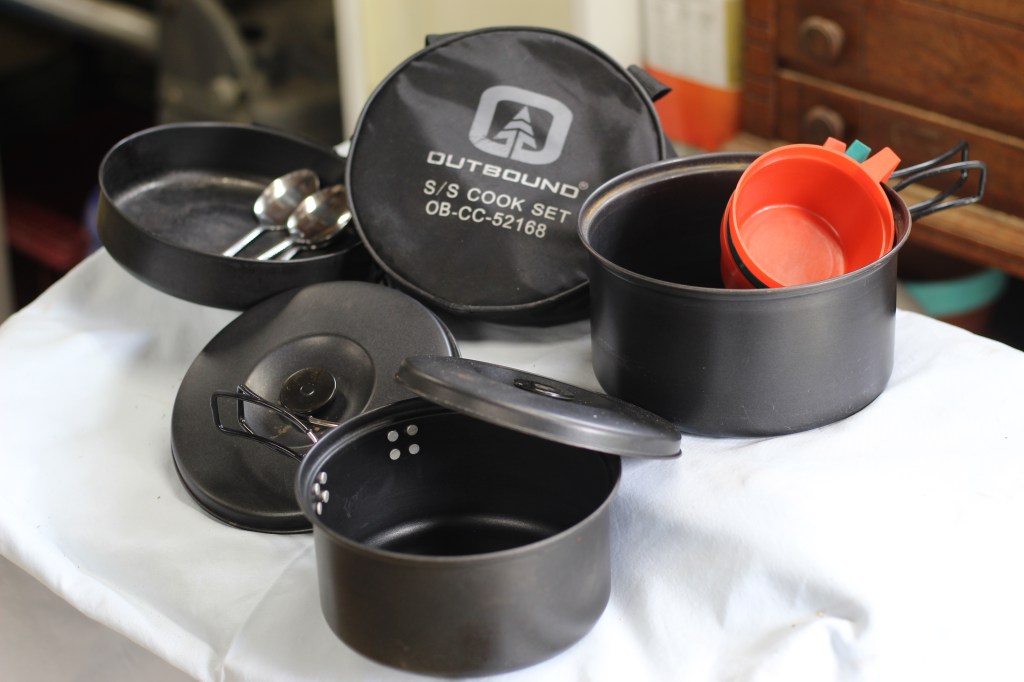
This set has 2 pots with tops, a plastic measuring cup and a fry pan. It is heavy and bulky but delivers options for bigger meals, when cooking for one or two. I have added 2 other plastic cups and three spoons to this kit. I avoid this set when allot of portaging will occur, it is in my ICW kit because of its versatility.
Titanium Pot kits
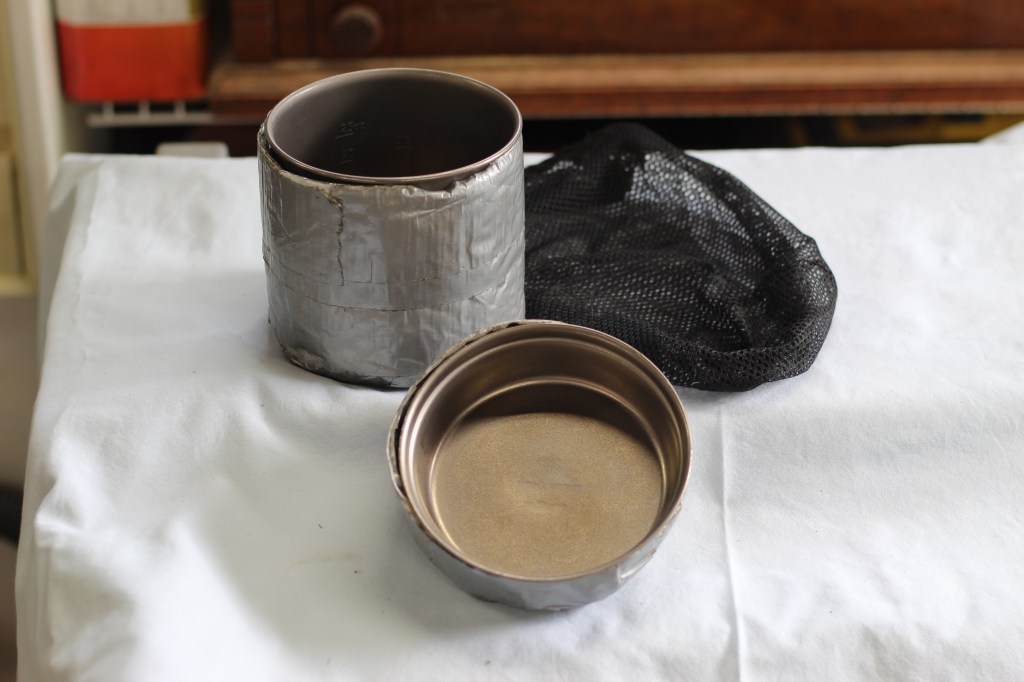
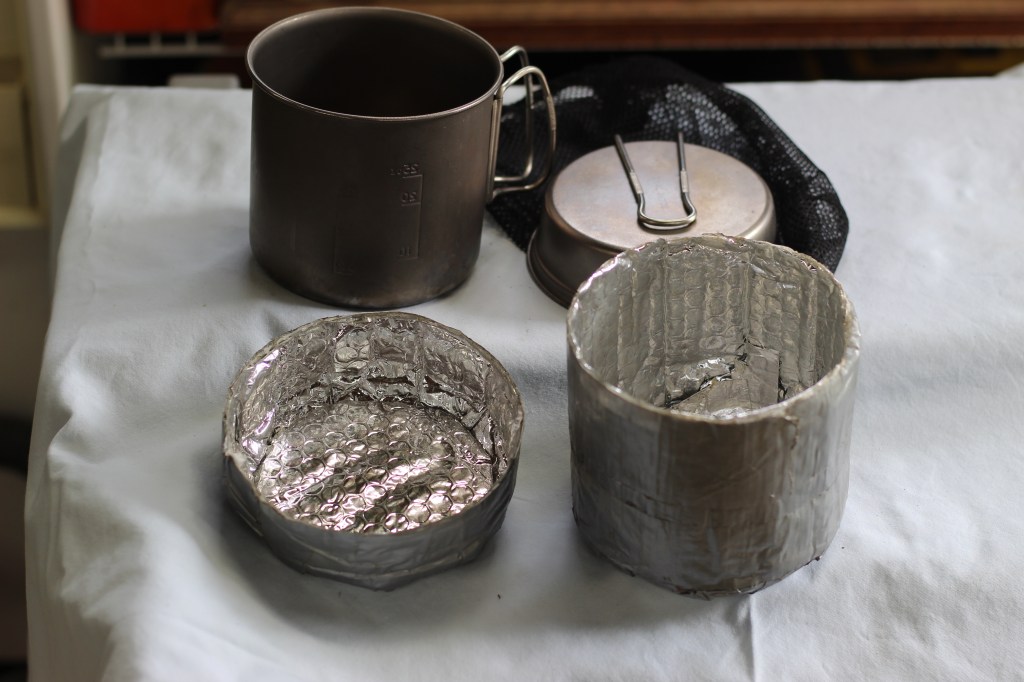
You can see for this pot I have created a pot cozy; it is made from bubble insulation. With this I can boil my dehydrated meal put it in the cozy, and let it sit for the 20 or so minutes it needs. This saves on fuel consumption, and gives me time to prepare other parts of the meal as it sits. This pot is just the right size for my coffee pot (described later) saving packing space. I like it allot as it is just the right amount of water for a full pot of coffee and a cup of oatmeal in the morning. One downside to this kit is that the fry pan handle folds and I have lost food when I lifted it and the handle folded. So at this point I never use the fry pan. I do not remember the brand of this pot kit.

This is the Health Pro brand set, the fry pan doubles as the pot tops. Another nice light weight option. I can not nest my coffee maker in the taller pot which nests in the shorter one so, I feel I waste some space. The handles on these are firmly attaches but like to rest around the pot even when on the stove. You can work that issue out easily with a twist tie or something similar. I like these and they come on the majority of my long trips. Just not the ICW trips as I have the aluminum kit.
Titanium Pros and cons
Upside: these pots are extremely light and very tough. Downsides: they are small and expensive. Best used when I solo. They don’t soot up like other cookware, which is nice when you are packing them, less dirt. I do have small bags for them, mainly to keep them together in the pack, but the soot can be an issue. I can nest some of my other gear in these pots to save space. I do not have a favorite brand, I purchased them based on their size looking for the largest.
Misc. cooking equipment.
Eating and cooking utensils:
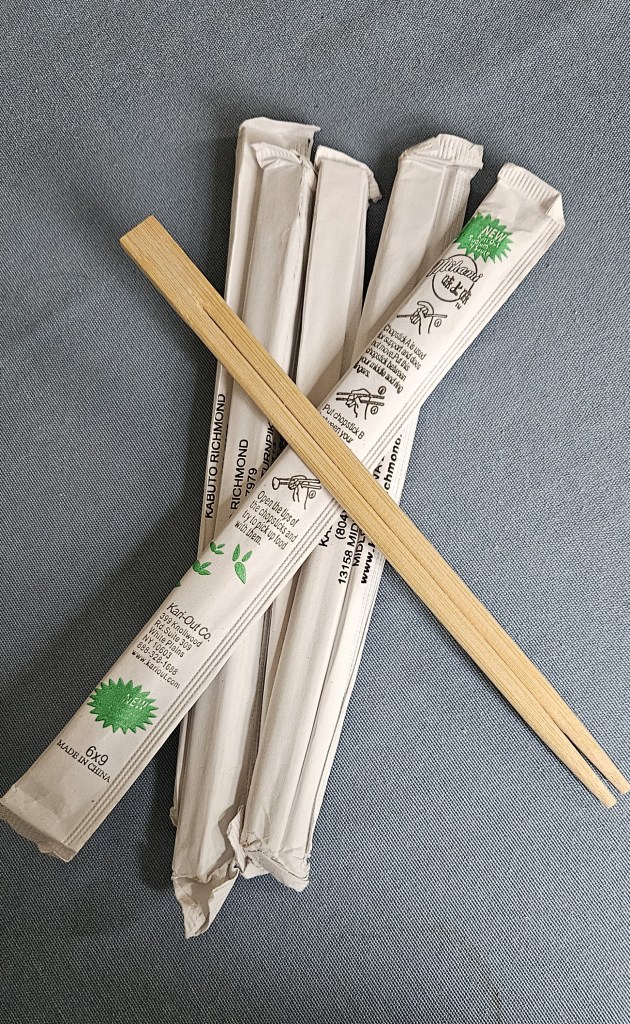
I don’t carry the normal knife fork and spoon set. I carry and use chop sticks as my eating and cooking utensils. I do carry a spoon which makes eating soup a bit easier and mixing sugar into coffee or tea. But otherwise the chopsticks do the trick, and if you loose them or run out then go whittle some.
Makeshift oven:
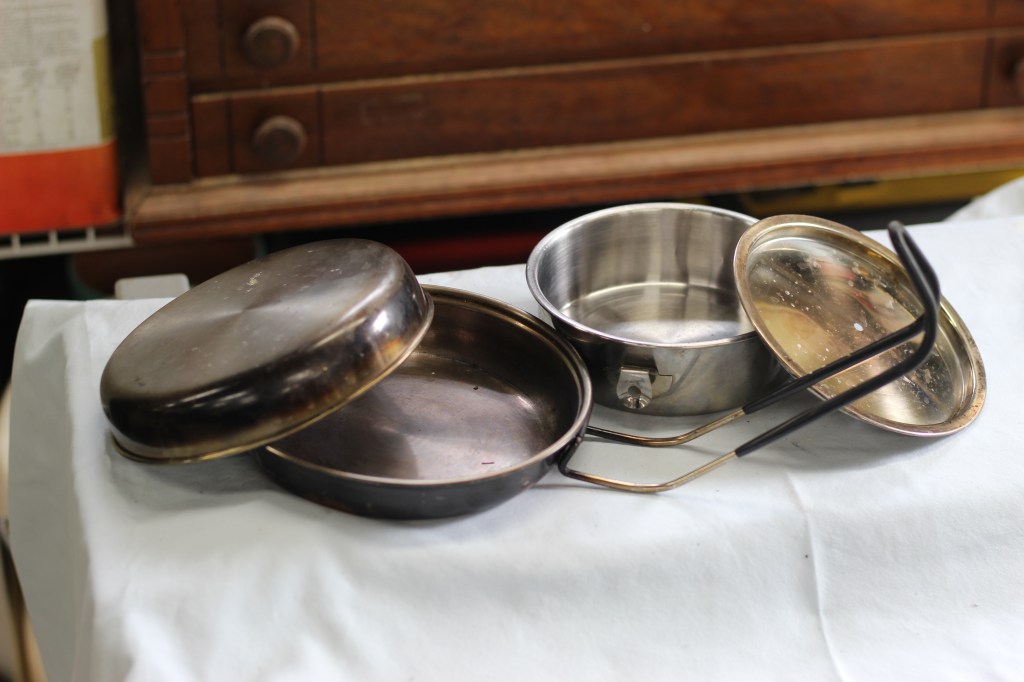
This technically could be under Pots and Pans, however I felt is more of a misc. item for most people. This is the old standard GSA/BSA mess kit, where I have removed the handle’s of the small pot. Their removal gives me the extra room I need to make this an oven pre se. Add 3 or 4 small stones or coins under the pot in the fry pan, in the pot put your “batter”, this keeps the cook pot off the direct heat. Then cover with the plate to complete the oven. I normally make corn bread this way. Half a box of Jiffy mix in the greased pot makes for some nice fresh corn bread. You can “bake” most anything you would like this way. I will normally use the twig stove with this setup but you can do this just over the fire. It does take some tending but it is a nice treat to have fresh corn bread, scones or the like.
Pot Grabber:
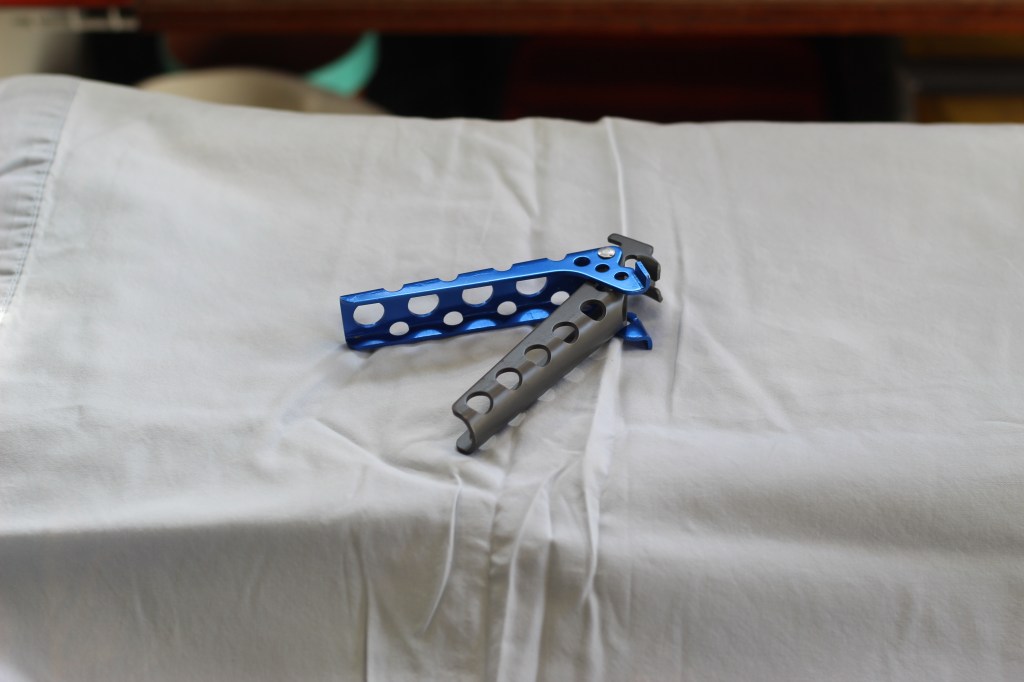
This tool makes it easier to lift any pot or pan should the handles get too hot. I don’t carry any pot holders and in the warmer months I don’t have full fingered gloves, so it helps with lifting hot pots It is light weight, small and easily packs, it nests in to most of my pot kits. It is ALWAYS with me.
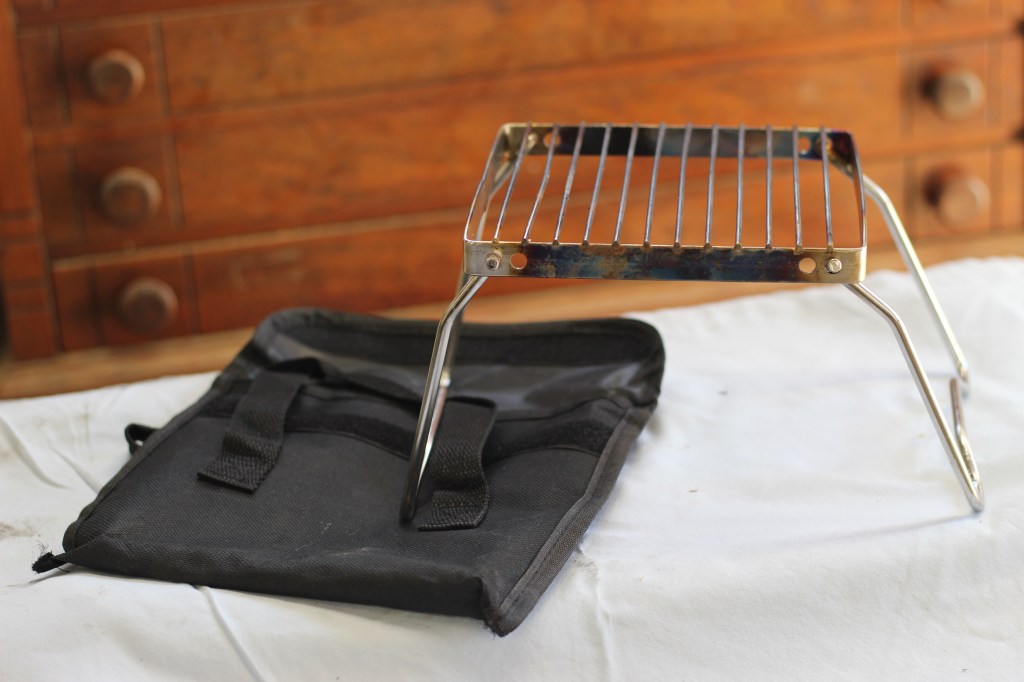
Pie Iron; Grille covers, Titanium wind break:
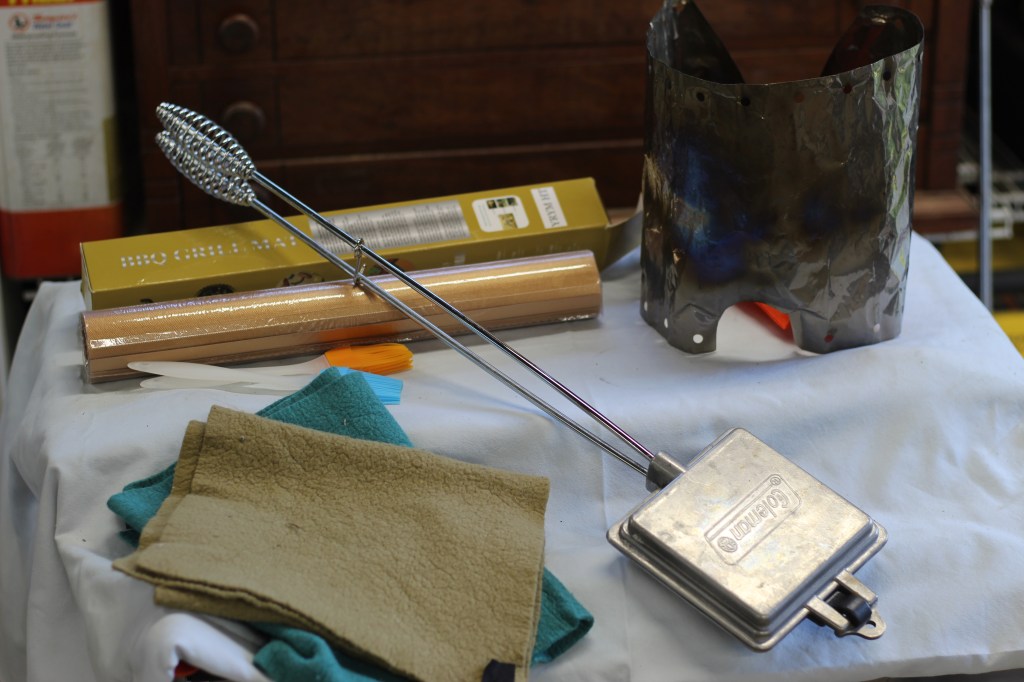
Upper right: This is a light weight titanium wind break for any of your stoves. It rolls up very tight, and has a memory. By that I mean it tends to want to stay that way and may need some encouragement to stay around your stove as needed.
Upper left: These are copper grille mats. We have all gotten to the campsite, found the communal grille and normally cover it with aluminum foil. I like these mats as they travel well and are reusable. This set came with 2 silicone brushes which was a bonus.
(Center diagonal) bottom right: This is a pie iron. If you are not familiar with this tool do a google search and find out how to use it and MANY recipe’s. I love the tool, it makes a great warm sandwich, breakfast delights and so much more. It can be use over a stove or fire. If portages or hiking is involved it stays home, otherwise it is along for the trip.
Bottom left: not cooking per se but these are chamois towels which can be used for clean-up. These are also my bath towels, but more on that later.
Eggs:

These egg containers are great to support carrying eggs. I seldom carry any refrigeration but you can still carry eggs for a few days. According to the FDA, eggs (fresh and unwashed) can be kept without refrigeration for 21 days. I tempt fate and will bring store bought eggs but won’t keep them past 5 days. It is nice to occasionally have eggs. More on that when I post about foods.
COFFEE:
Yes Coffee gets its own space – as it is an essential.
Coffee Pot kit:
I NEED my coffee in the morning, just to get me going and warm me up first thing. I don’t need allot nor do I drink it often, but it is always with me.
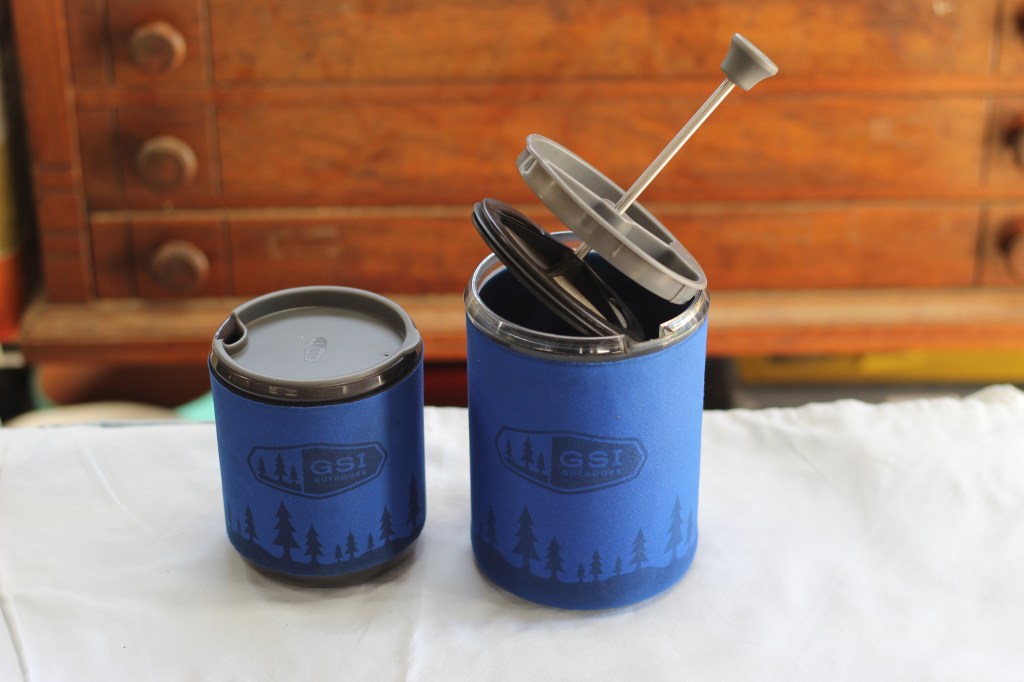
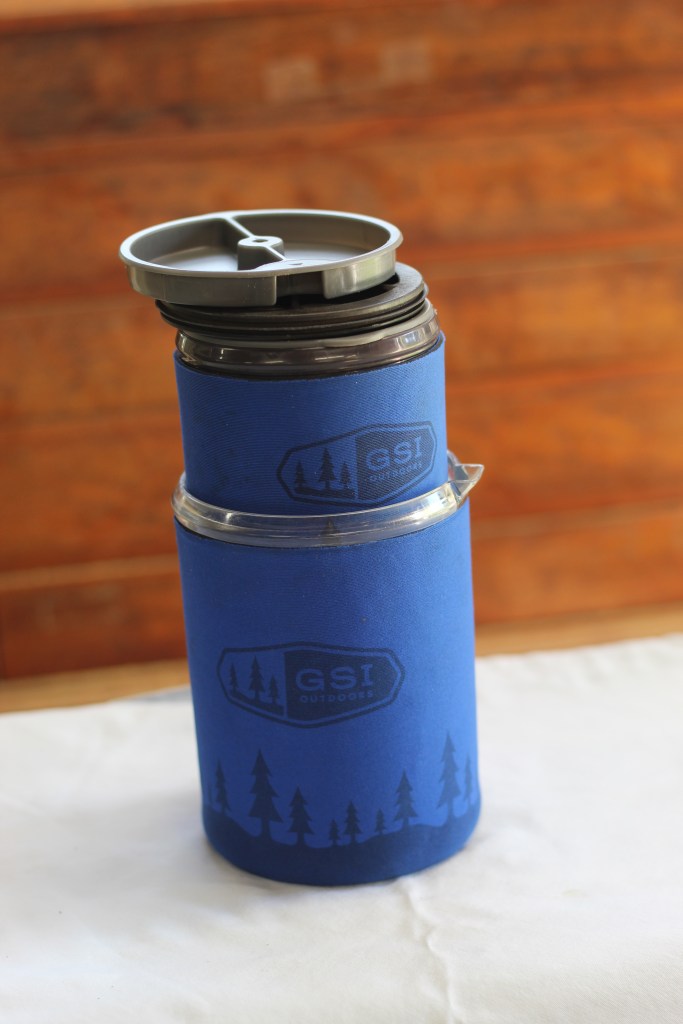
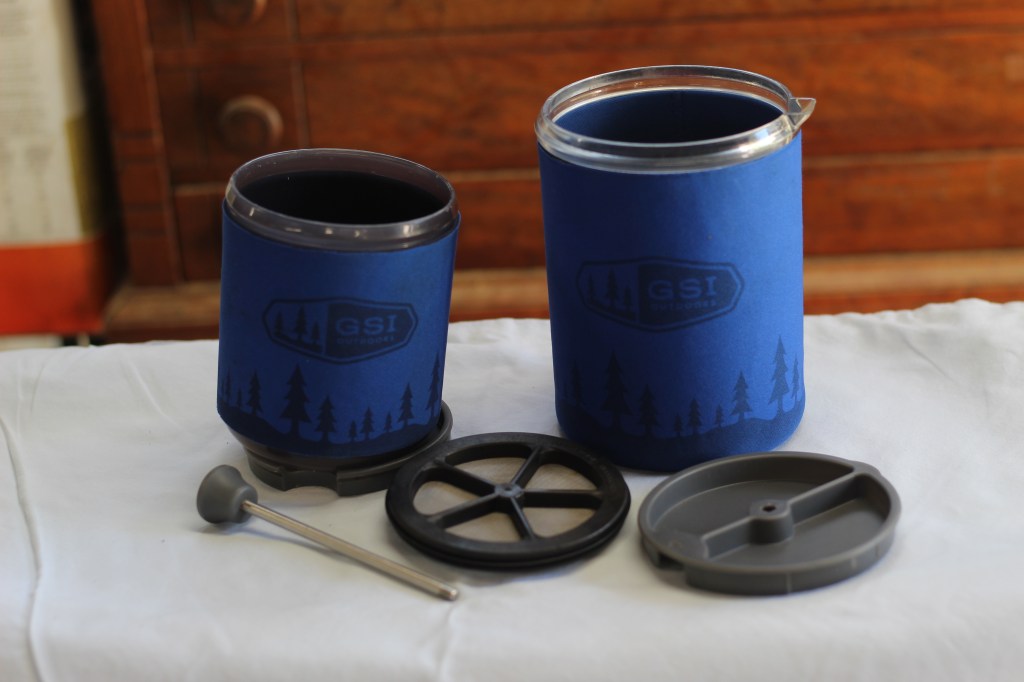
This is one of those gifts I received and am so grateful for, I am never without it. GSI makes this setup in different sizes, this one (which can nest in my titanium pot) makes about 2 cups of French Press coffee. As you can see it breaks down and packs as the size of the larger cup. When I brought it on a trip my canoe partner got one as soon as we got home. I can’t say enough good about it; easily cleans, small and compact great coffee press (be sure to get course ground coffee for best results) and the light covering actually keeps the contents hot. Either cup can be used alternately as a bowl.
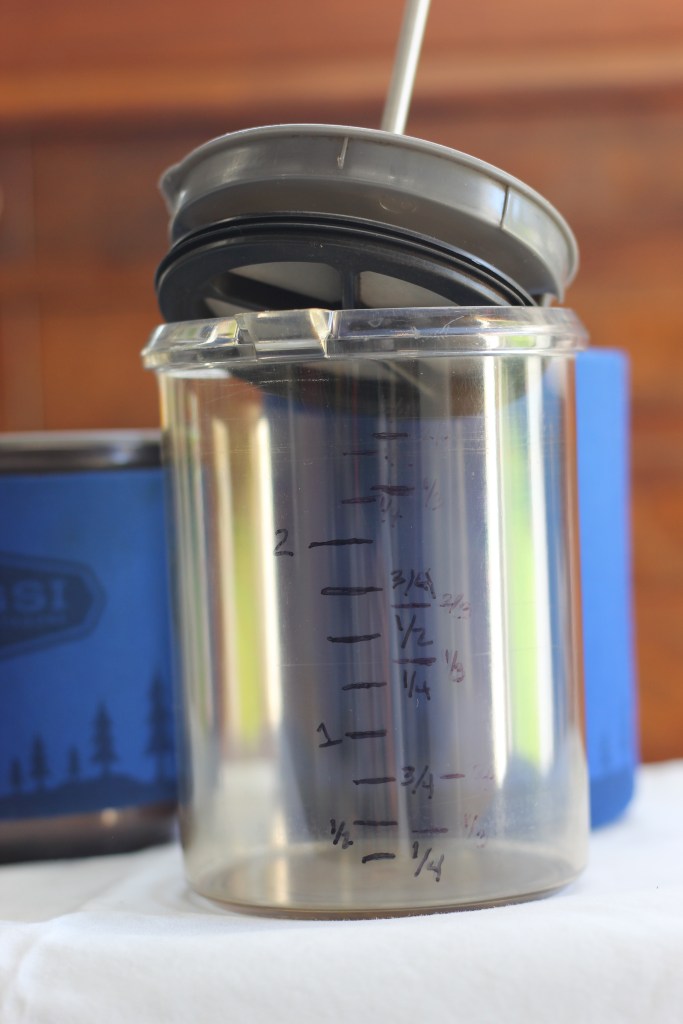
This small modification of marking off liquid measurements makes the set even more versatile. I would suggest using a Dremel tool to score the plastic for the markings as my marker is beginning to wash off. I will be doing that when I remark these cups. As you can see the larger cup is actually 2.5 cups of liquid.
Clean-up:
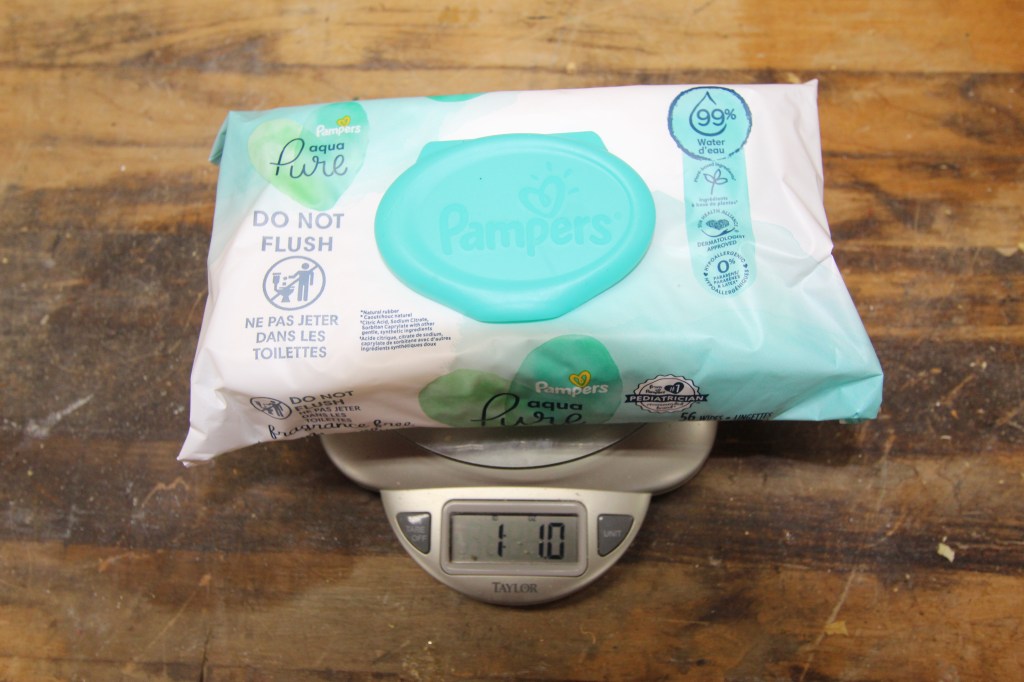
Wipes:
I found wipes that were 99% water and used them as my initial wipe when cleaning pots pans and eating utensils.
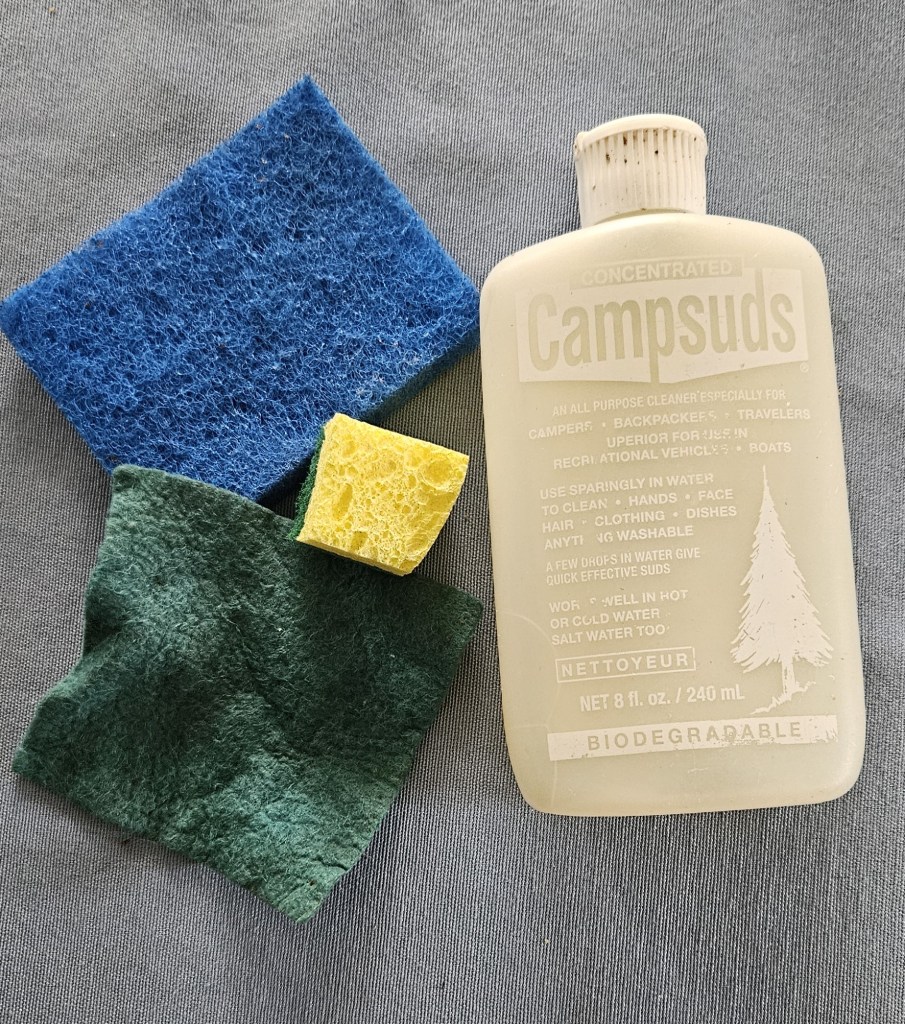
Scouring pad, sponge and soaps:
Then there is the normal cleaning materials. For soap I use the camp suds, I grabbed a scouring pad, a small piece of the towel and a small piece of yellow sponge. These can clean whatever pot or eating utensil I use on a single meal.
Keeping gear dry:
Whether you are in a canoe or kayak or any boat for that matter, dry bags are a necessity. Plastic bags work fine, and I use them regularly for food items and the like. However dry bags serve a different purpose and hence I created this section for them
Earth-pac dry Packs:
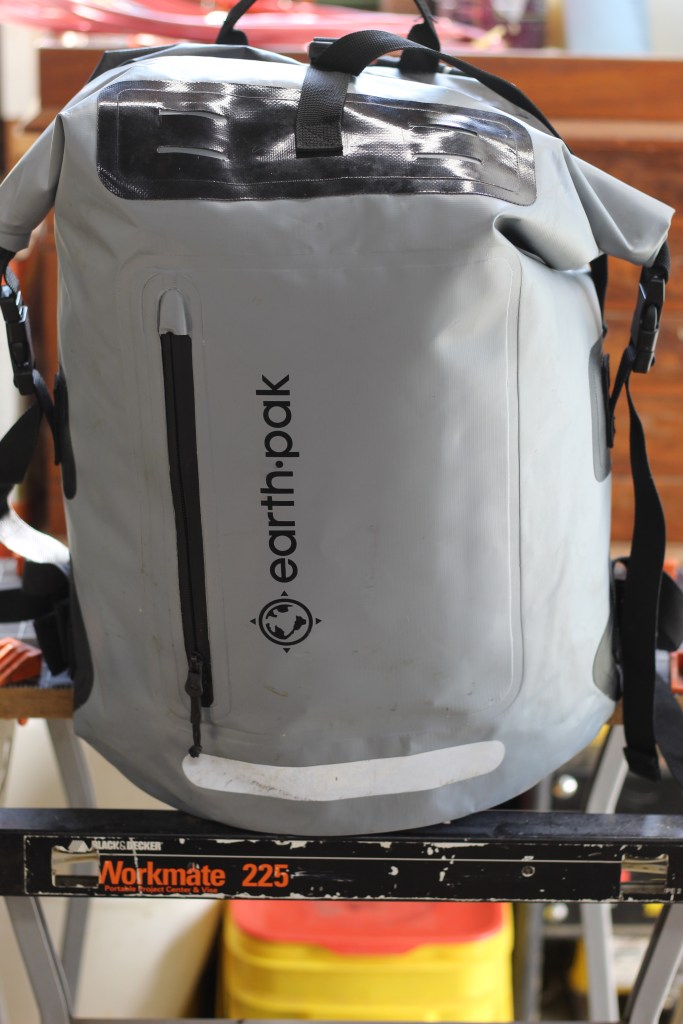
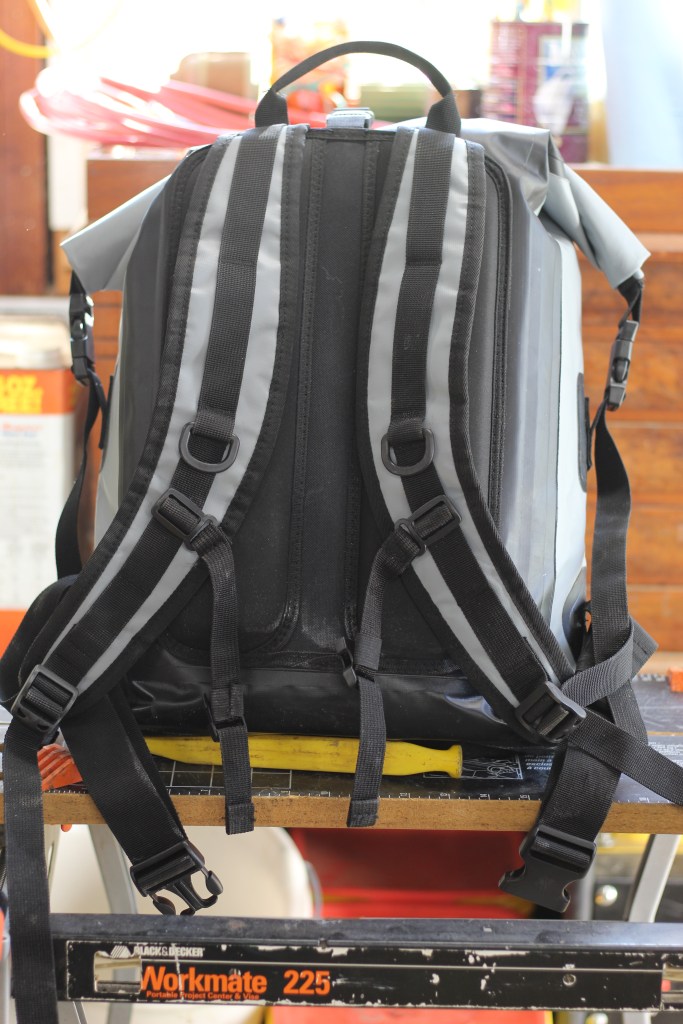
The Earth-Pac brand dry packs are my go to. This pack is just that a pack, good back, strong shoulder straps and a hip belt. If there is going to be times where you have to carry your gear, portage …, I surely recommend this brand dry bag.
I have a 55 liter as my main bag, two 35 liter bags I use for my camera equipment and as a food bag. The sturdy shoulder straps can be used to hang the food bag as your bear bag where required. I used an Osprey backpack in the beginning. However I found that mice and squirrels could/would do a number to that if they wanted what was inside. This bag has not been touched, most likely because the critters can’t smell what is inside as easily.
Other dry Packs:
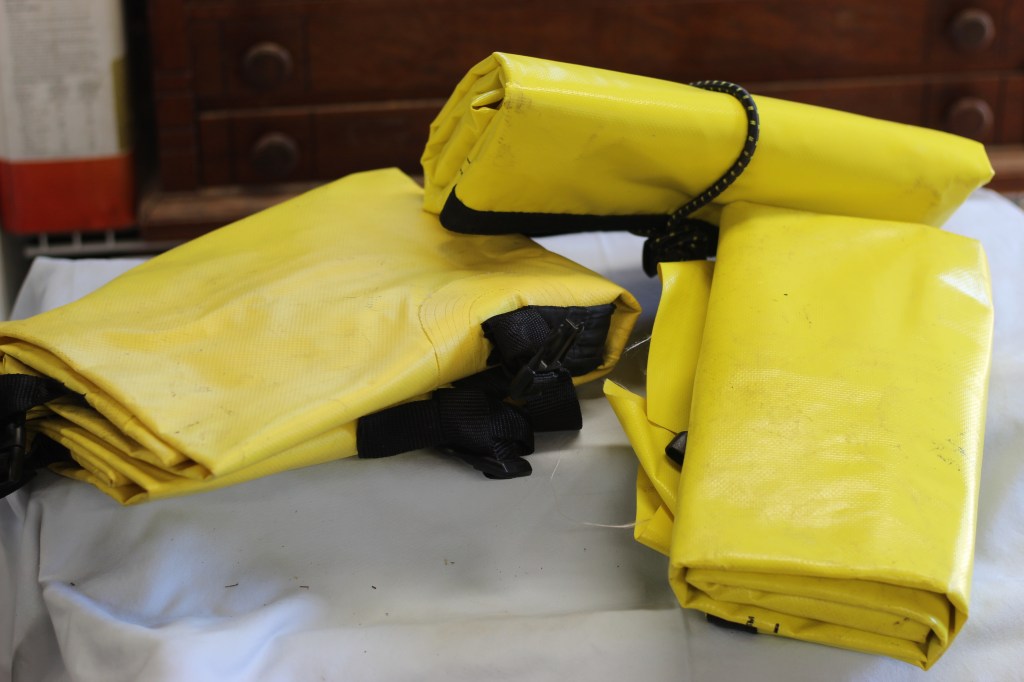
I got these different sized dry packs early in my canoe trekking interest. They served their purpose but were never a good option. I hardly use these at all anymore, they take up space in my shed. One has pack like straps that are very thin that cut into me, the others don’t have any straps which makes the great for storage but not for portaging. I would think that on other boats these would be great. But where portaging or off loading at each location is part of the plan, they aren’t effective.
Compression Sacs:
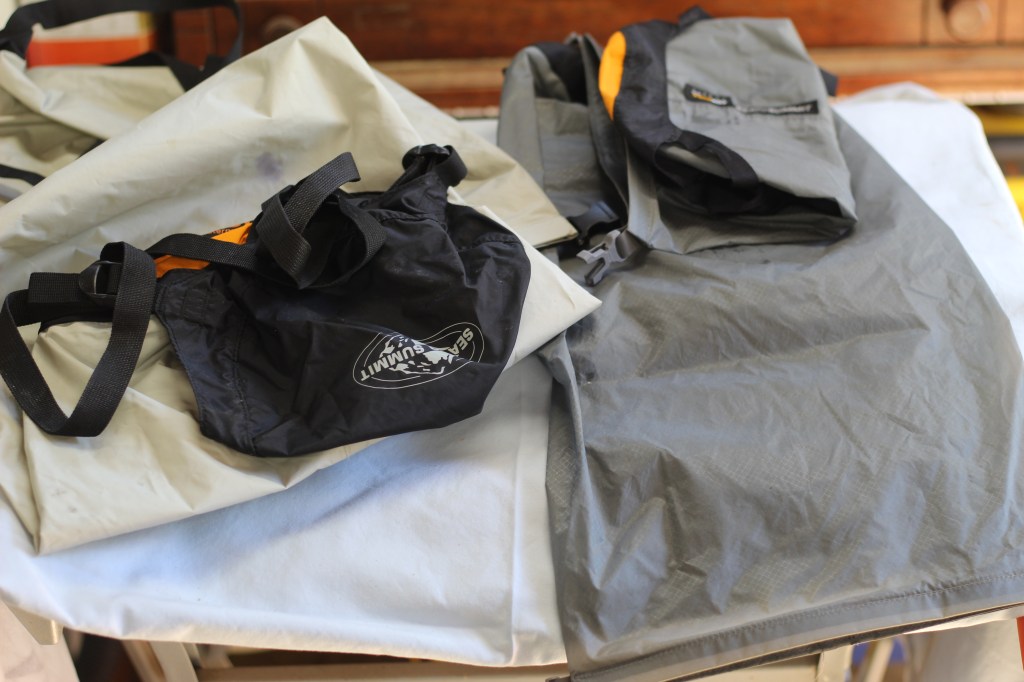
These sacks allow you to put stuff in it, synch-up the straps and it compresses out the air trapped in them. They are advertised as dry bags; but I question, if air can escape why can’t water infiltrate? (UPDATE 3/1/2024: Water does infiltrate but extremely little – things do get damp) Regardless I do use them every trip but if I feel there is a good chance of them being in contact with water, I will put them in a dry bag or plastic bag. The compression feature sure does help with space issues, so they are a great addition. As you can see; Sea to Summit is my go to for these bags.
Assorted Dry bags:
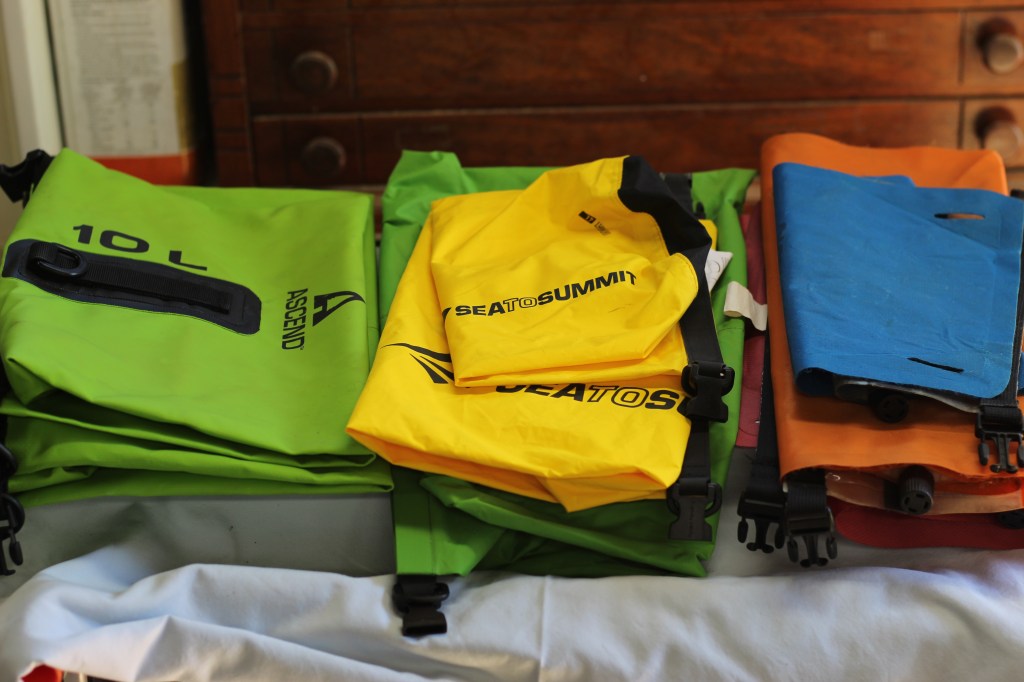
These bags are completely water proof. Often having some sort of plastic or silicon layer incorporated in them. I am currently a fan of the lightweight ones as they are less rigid. I have an assortment of sizes and even have a few dinosaurs that have vents (right side of photo). They require you get out as much air as possible (except the vented ones) and all require that you should take a minimum of three rolls to close them. Getting the air out and making the rolls is a learned skill. Here I also prefer the Sea to Summit brand, the Ascend (this brand is in Cabela’s and Bass Pro) has been very nice but I have not found them in the lightweight version.
Water:
Water is of course essential to all trips. It has become a focal point with the ICW trip; water everywhere but none to drink. Here are my potable water gathering, storage and purification methods.
Life Straw:
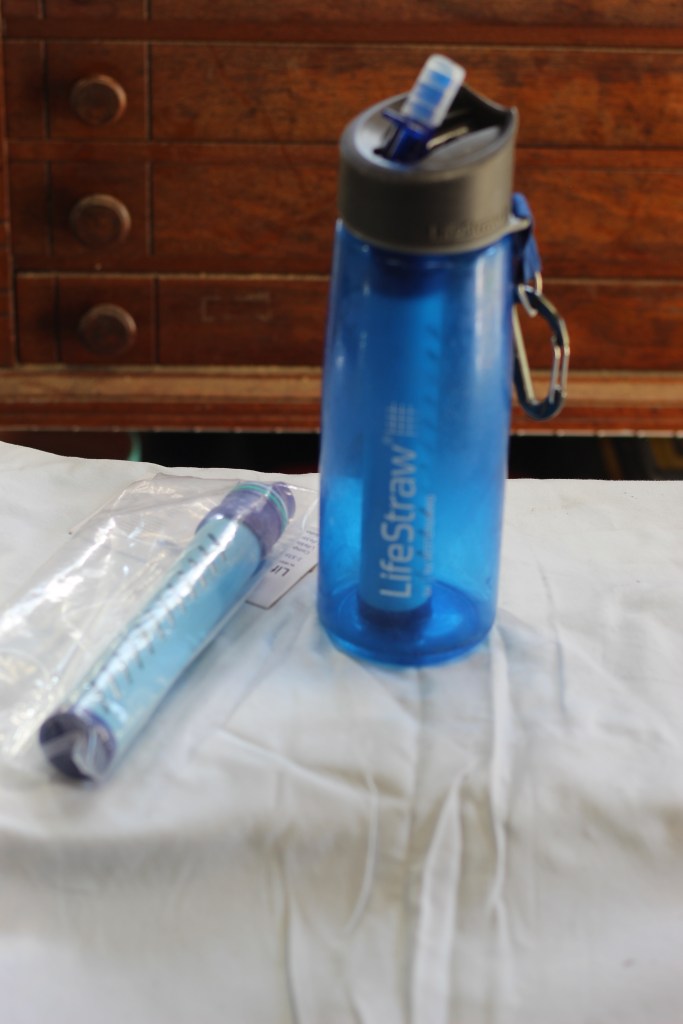
This is a great drinking water bottle when you are in areas where you can dip and drink. LifeStraw makes multiple products for purifying water for you to drink. I like this one because it stays handy and when empty just dip for more water. It can NOT change salt water to fresh, so it is only usable in areas where there is fresh water. It filters out most of the issues found in fresh water in the wild; but Giardia is not one of them. If there are beavers in the waterways where you are dipping, dip away from shore and best in deeper fast moving water.
Platypus water filtration
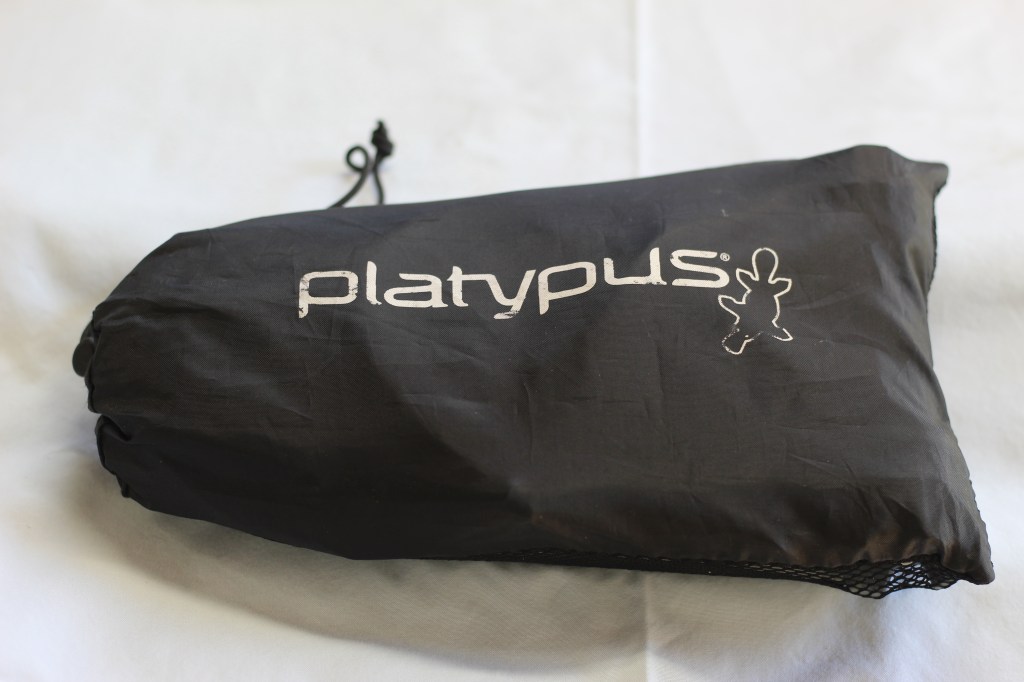
The Platypus gravity water purification system has been with me for some time now. As a young person I normally just brought my water with me. At 8 lbs. per gallon that is just too much weight not to mention the space it takes up. I like the volume of clean water the system produces in a short time making meal prep and cooking cleanup easier. Platypus has many different products and I have found the company to be very helpful and reliable. If the LifeStraw wasn’t given to me as a gift I may have gone with the Platypus version.
As you can see there are two reservoirs in this system. The first reservoir (Dirty Water) is the one used to dip for water. Like with the life straw move away from shore to collect your water. You then hang the dirty water higher than the clean water bag. They are connected by a tube and filter so that the dirty water flows through the filter into the clean bag. The height difference does not have to be all that great. There is a learning curve on getting the water to flow through the tube, but there are good instructions too.
Collapsible water carriers
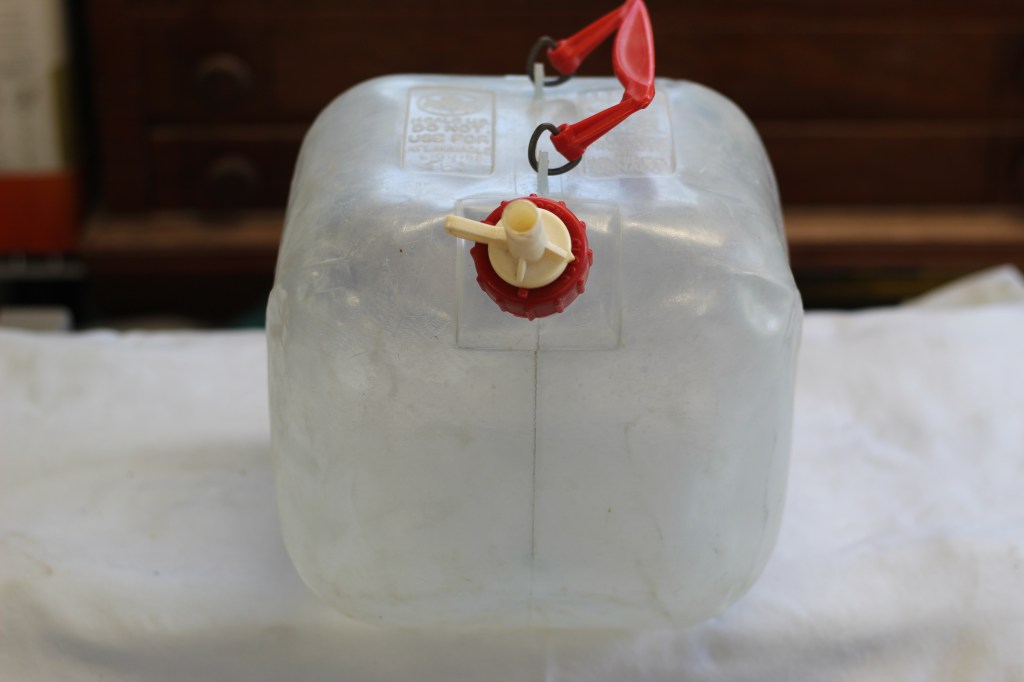
This is what I grew up with, 5 gal./40 Lb. water container. I have had them for decades and used them regularly in the past. I used them on the first ICW attempt but the issue of weight and space made them impractical. On ICW 2023, this monster was on top of the kayak and was a small sail, I just hadn’t thought it out properly.
Collapsible Hydration Packs
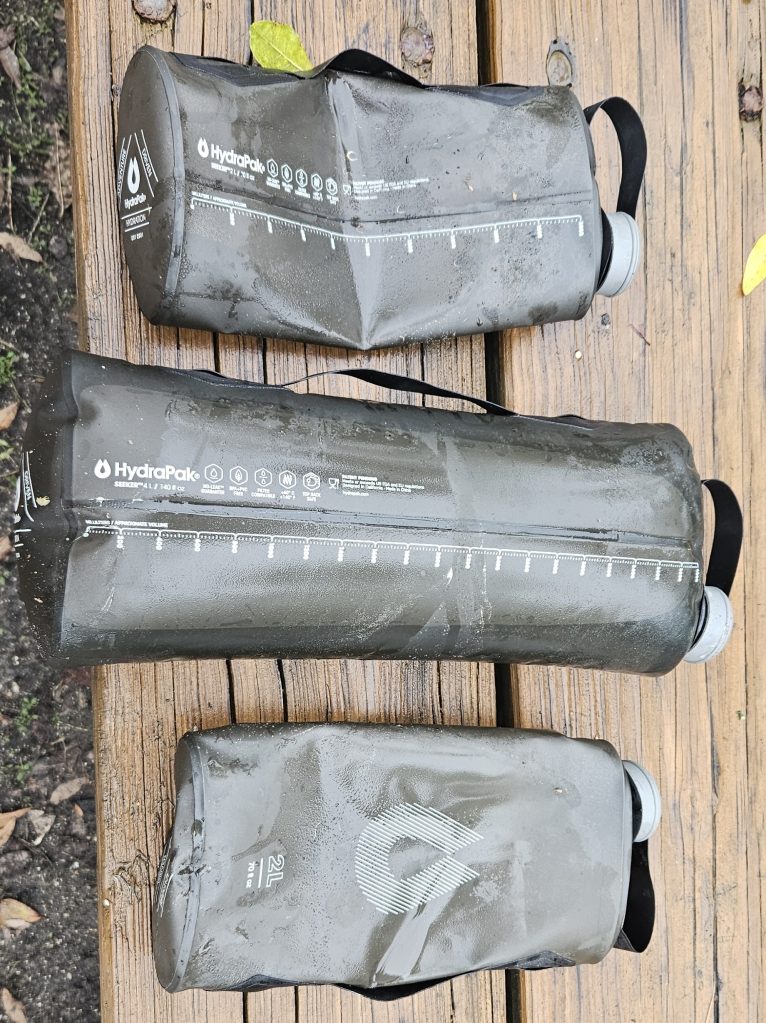
These are similar to the collapsible water bottle previously, however newer materials and much better size selection. I have three 2 liter and a 4 liter set that fits tightly behind my kayak seat. I have only had these for the 2nd ICW trip, so limited use thus far. I like them very much so far.
Electronics
I bring a boat load of electronic dependent devices, mainly cameras and a phone.
Battery Banks:
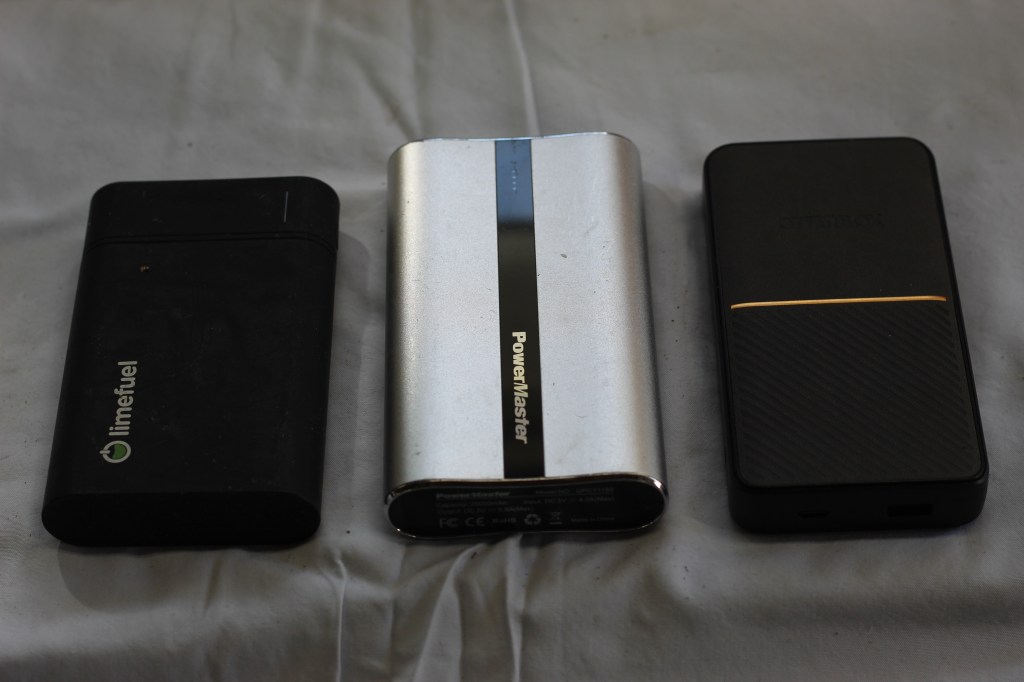

These are three battery banks I bring regularly. I always look for the biggest I can find, the left most is nearly 15 yrs old (I am waiting for it to die), the newest is OtterBox’s on the right. All are at least 10 mAh and I can charge most of my equipment from these.
Solar Charger
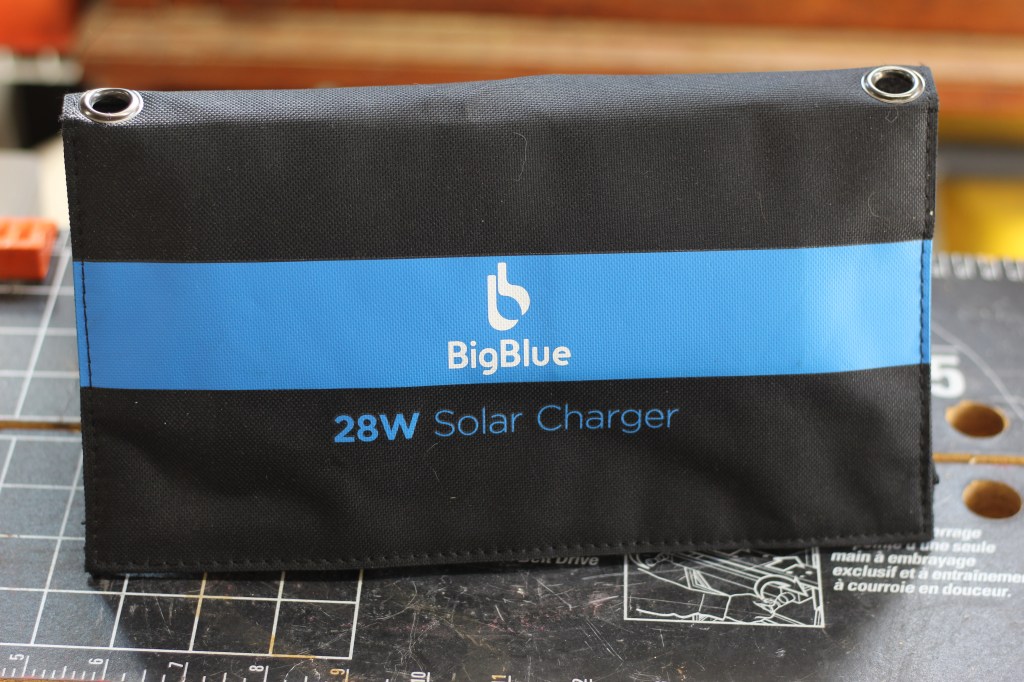
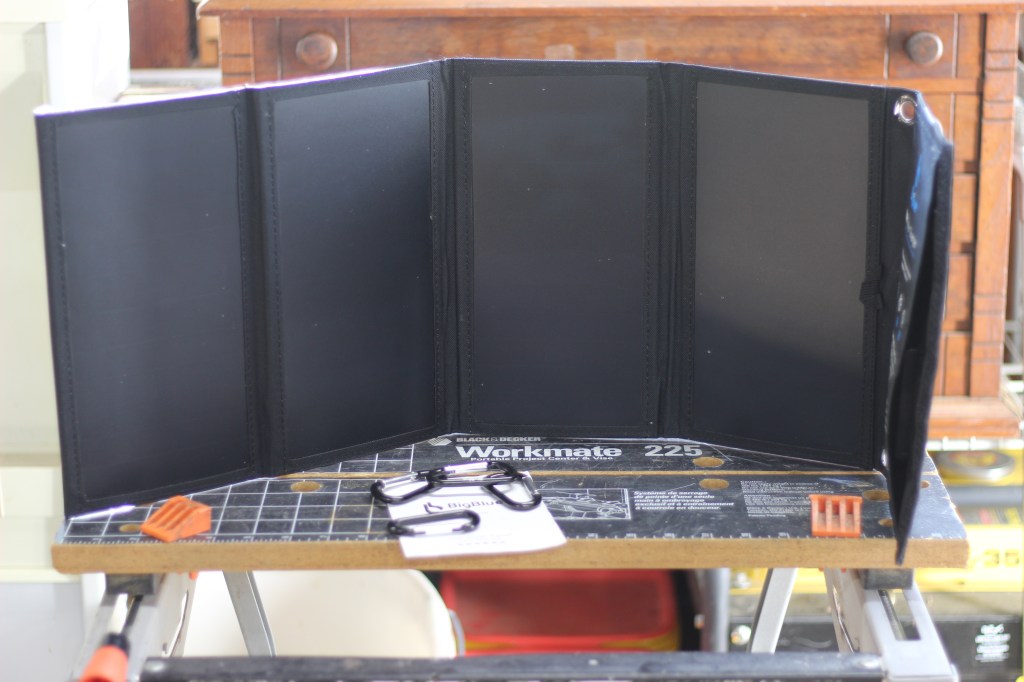

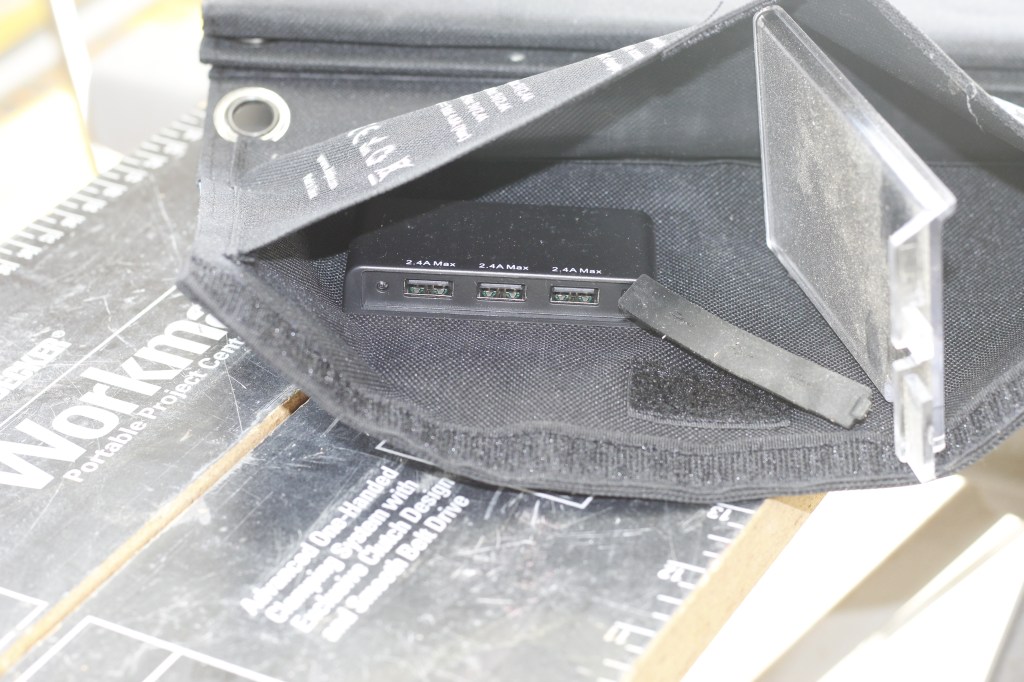
This was another gift to me, from a friend that received two. It has worked extremely well in Canada and Maine, and at this point I haven’t used it on the ICW. You can see it will charge three devices at a time, I am not sure of how long it takes to fully charge things. I set it up in the morning when heading out to fish and return and the three battery banks are charged.
Hygiene:
Water is of course essential to all trips. It has become a focal point with the ICW trip; water everywhere but none to drink. Here are my potable water gathering, storage and purification methods.
dental, soap, …:
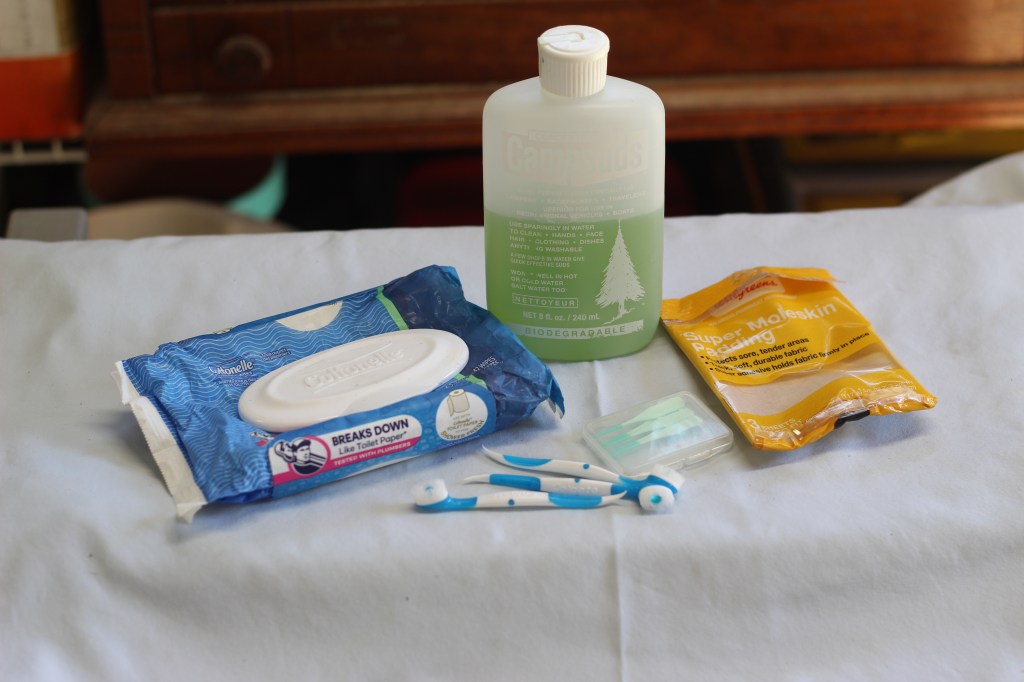
In the top photo there are the Colgate Whisps (tooth brushes), dental picks, moleskin, body wipes and camp soap (biodegradable). In the bottom photo the chamois towels, in the lower left corner are the only towels I bring. Not pictured, is my deodorant or any bar soaps I decide to bring (I use the camp soap mainly). These items are used in conjunction with the collapsible bucket.
Creature comforts
Not sure what else to call this section, it is just gear I find that makes it comfortable..
Bucket:
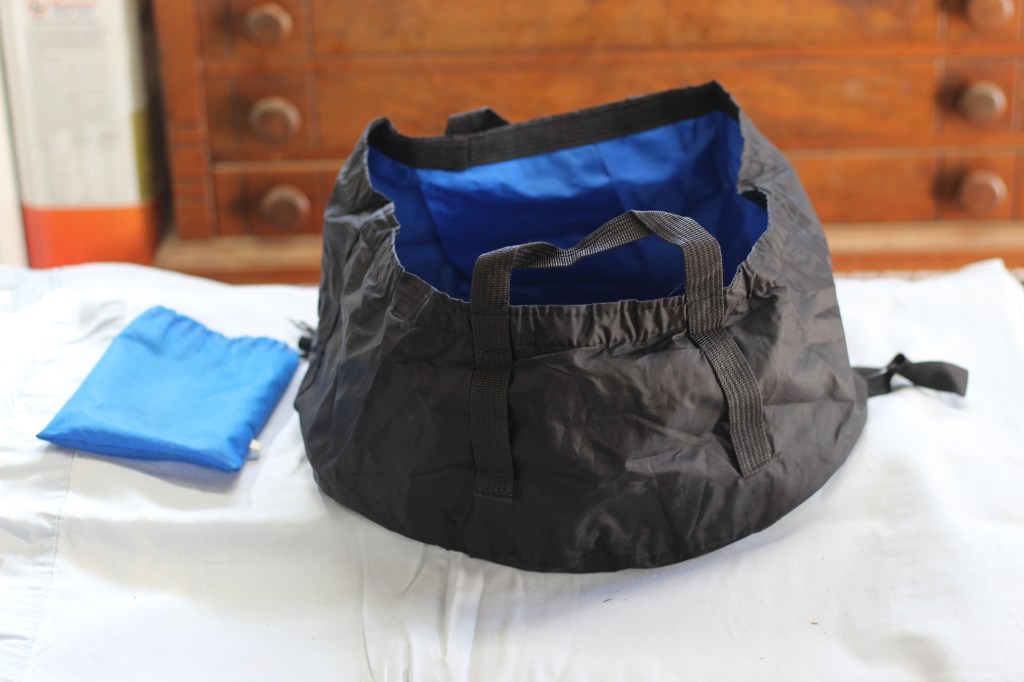
This is a collapsible bucket that has multiple uses. The black coloration of the outside allows me to “solar” heat it while I am out to come home to a “warm” bath. Since I use biodegradable soap (which must pass through soil to be biodegradable) it is nice for the rinse to be warmer than the lake/waterway I am on. Jump in get wet, exit, lather then rinse. Otherwise it also seconds as a normal bucket.
Tie’s –
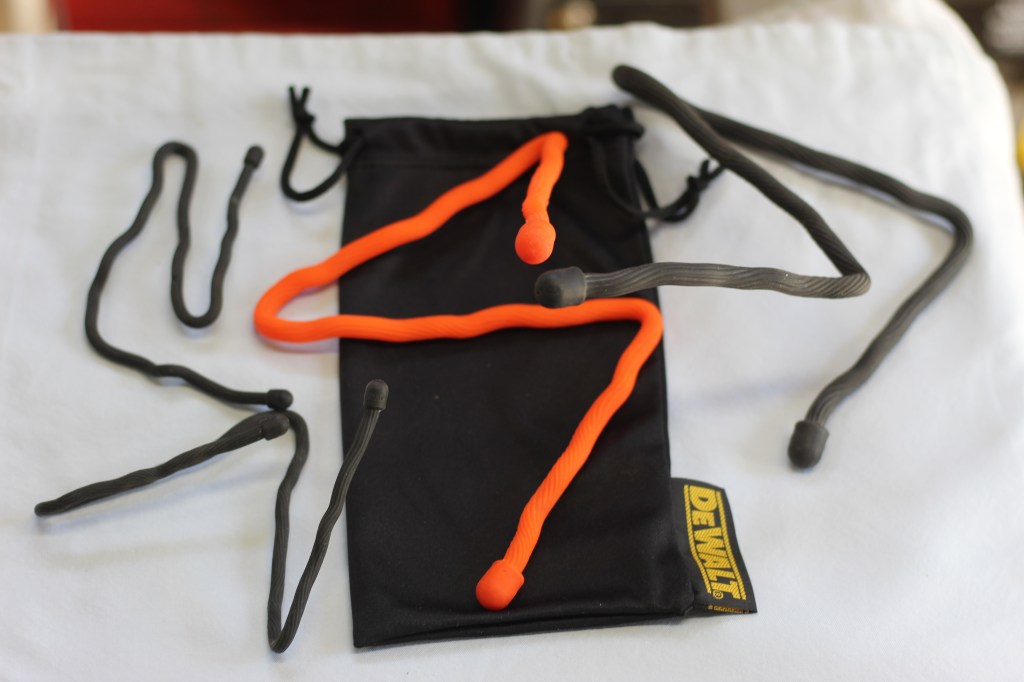
These ties can be found in most hardware stores. They are very useful in attaching things to your boat. I have them but haven’t used them on this ICW trip. They are extremely useful in a canoe to hold fishing poles or extra paddle. The Dewalt bag came with sunglasses I purchased, it keeps these guys in their place when not in use.
Clips –
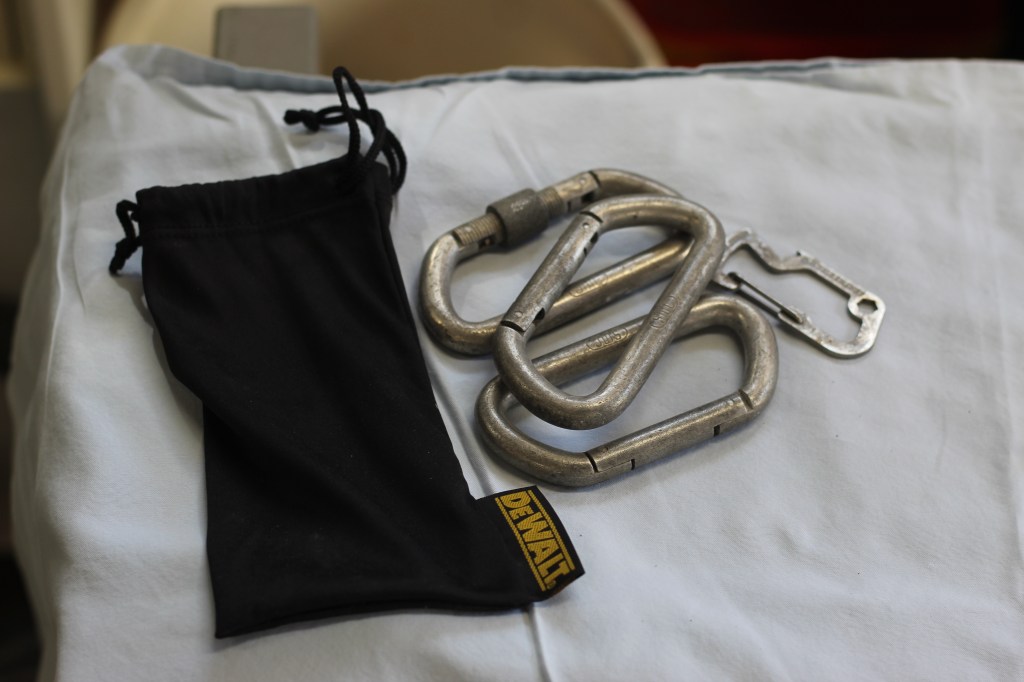
I use these carabineers and others (those cheep promotional ones) to clip in/on bags of things inside the kayak/canoe. They are necessary up north where a bear bag is required. I use them as a pully system to raise and lower the bag.
Saws & Axes
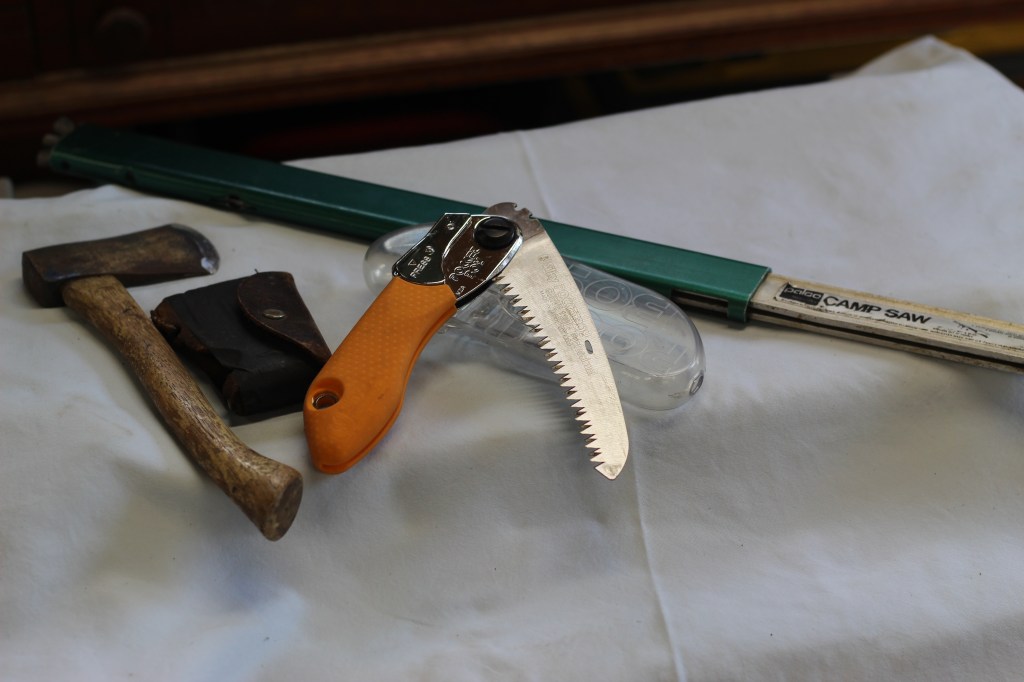
I normally only carry the center saw, a Silky Pocketboy 130, a very sharp dependable saw. My wife is a certified arborist and suggested this brand, I haven’t looked any further. It folds neatly into the plastic case and stays razor sharp. No, it isn’t big but who needs to cut stuff bigger than a few inches in diameter
The other saw is a great saw that I got as a kid. Still has the original blade (which should be replaced) but it is old dependable. Since getting the Silky I leave this one home now.
The Axe is hardly every brought with me, I normally only use it as a hammer. It too comes from my early scouting years.
Mattress

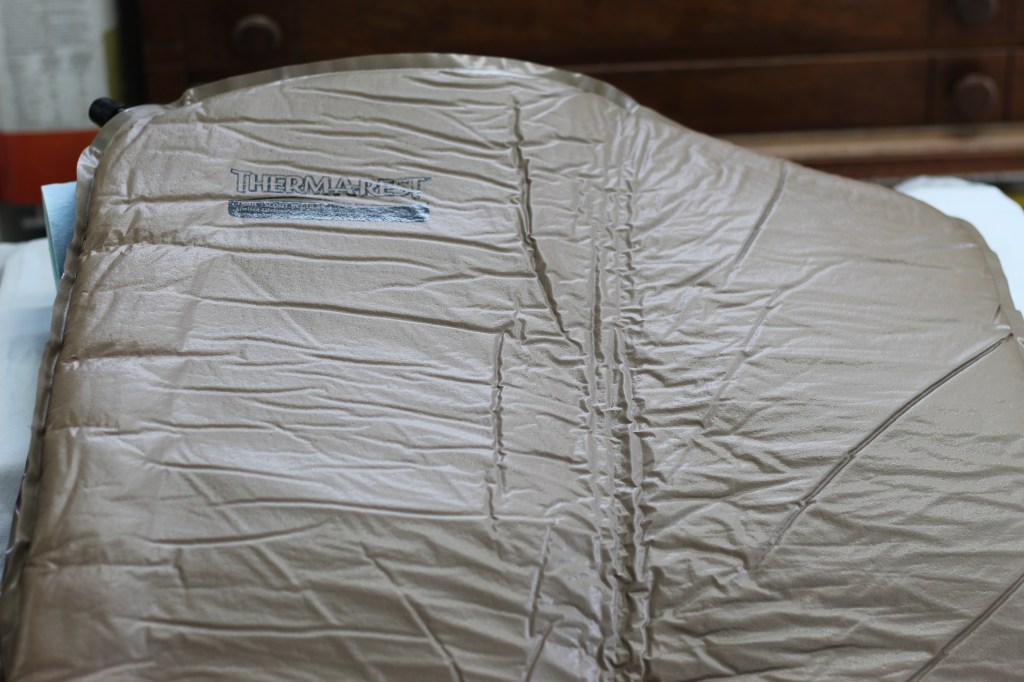
I normally don’t carry an air mattress, it isn’t needed in the hammock. This ICW trip I have this one with me since I also have a tent; and a good thing too since I have had to tent this trip. This is the Thermarest self inflating mattress. I still blow it up, since it has been compressed in storage so long. It takes the hardness and cold out of the equation. It is only 1/2 inch thick so it can only be so comfortable. I got when I hiked more than I do now, and I do not regret getting it. I can’t find it on their website but there are new and improved versions.
Bug Shirt/Hat
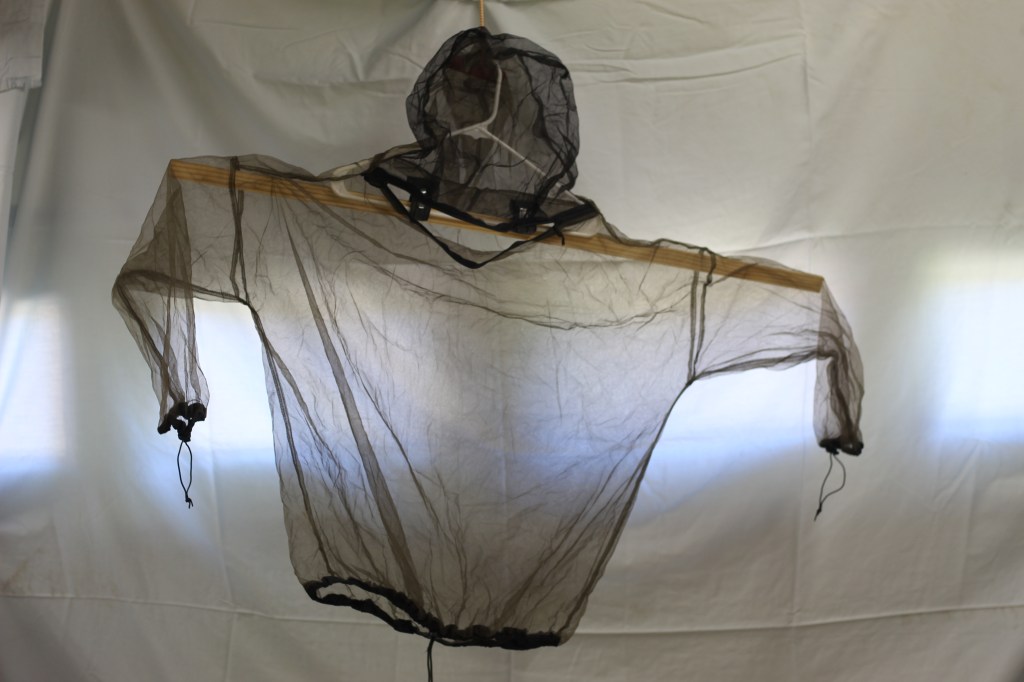
The Bug Shirt – As the name implies keeps biting bugs away from you to and extent. The shirt is hot and well if it is up against you the bugs got you. When you are in the heat of Blackfly or mosquito season, it is a must. I have a hood that goes over my hat for those cases where the shirt is too much. The hood is a bit more comfortable.
Cloths
I am not going to bore you with pictures here; more of a running list of the clothing I bring. This is of course a personal decision, and you would adjust accordingly.
- Shirts
- 3 High SPF valued Columbia style shirts (day to day)
- 1 Older Columbia style shirt (laundry day cloths)
- 4 HUK fishing high SPF value lightweight shits (day to day)
- Pants
- 4 quick dry pants
- 1 base layer long pant (sleeping)
- 4 underwear
- 2 web belts
- Feet
- 3 pair of Lightweight nylon socks
- 2 pair neoprene socks
- 3 pair low cut cotton socks
- 1 pair wool socks
- 1 pair water sandal’s
- 1 pair sneakers
- Shell
- 1 Sweat Shirt
- 1 Lightweight windbreaker
- Rain gear
- 1 rain pant
- 1 rain jacket
- Hat
- 1 wide brimmed hat
- 1 baseball cap
